by Winding Pathways | Feb 1, 2016 | (Sub)Urban Homesteading, Foraging, Nature, Trees/Shrubs
Preparing for the season’s first food harvest is a fun way to spend a few hours during winter’s deep freeze. Cornell University Cooperative and New York’s DNR have an excellent PDF “Maple Syrup Production for the Beginner.” Wikipedia features a comprehensive overview of syruping.
Trees of many maple species will flow sweet sap as soon as daytime temperatures rise into the high 30s while nights drop below the freezing point. That can happen in early February down South and six weeks later in Canada.
Syruping is fun, educational and a wonderful activity to share with children. It can be done far beyond the classic syruping regions of New England, Canada and the Lake States. We’ve been in touch with families from North Dakota to North Carolina who make maple syrup. We’ve made gallons in Iowa. All it takes is a tree or two of any maple species, the right weather and simple tools. When done properly, it doesn’t hurt the tree. Silver, sugar, black, and red maples all run sweet sap. So does the box elder, which is a true maple.
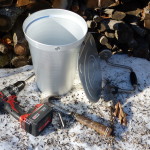
You’ll find past blogs on Winding Pathways that show how to make simple syruping equipment. Type maple syruping in the search box at the bottom of the screen or click on this link. Almost everyone already has everything needed to make small quantities of syrup, but it’s easier and a bit more sanitary to use manufactured equipment.
Many companies sell syruping equipment, but most are geared to supply large commercial operations. Tap My Trees is different. They sell easy-to-use equipment to folks wanting to tap a few backyard trees. Their website also includes helpful information on how to tap trees, collect sap, and boil it into syrup. Check it out!
-
-
Clear sap dripping into the bucket.
-

-
A clean milk jug makes a simple “bucket” to collect sap.
-

-
Carrying “modern buckets” on a yoke.
-
-
Maple Syrup’s taste is stronger with a deeper amber.
-
-
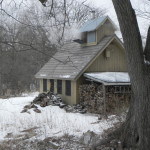
A traditional sugar shack
-
-
Modern equipment make backyard syruping easy and pleasurable.
by Winding Pathways | Oct 25, 2015 | (Sub)Urban Homesteading, Garden/Yard
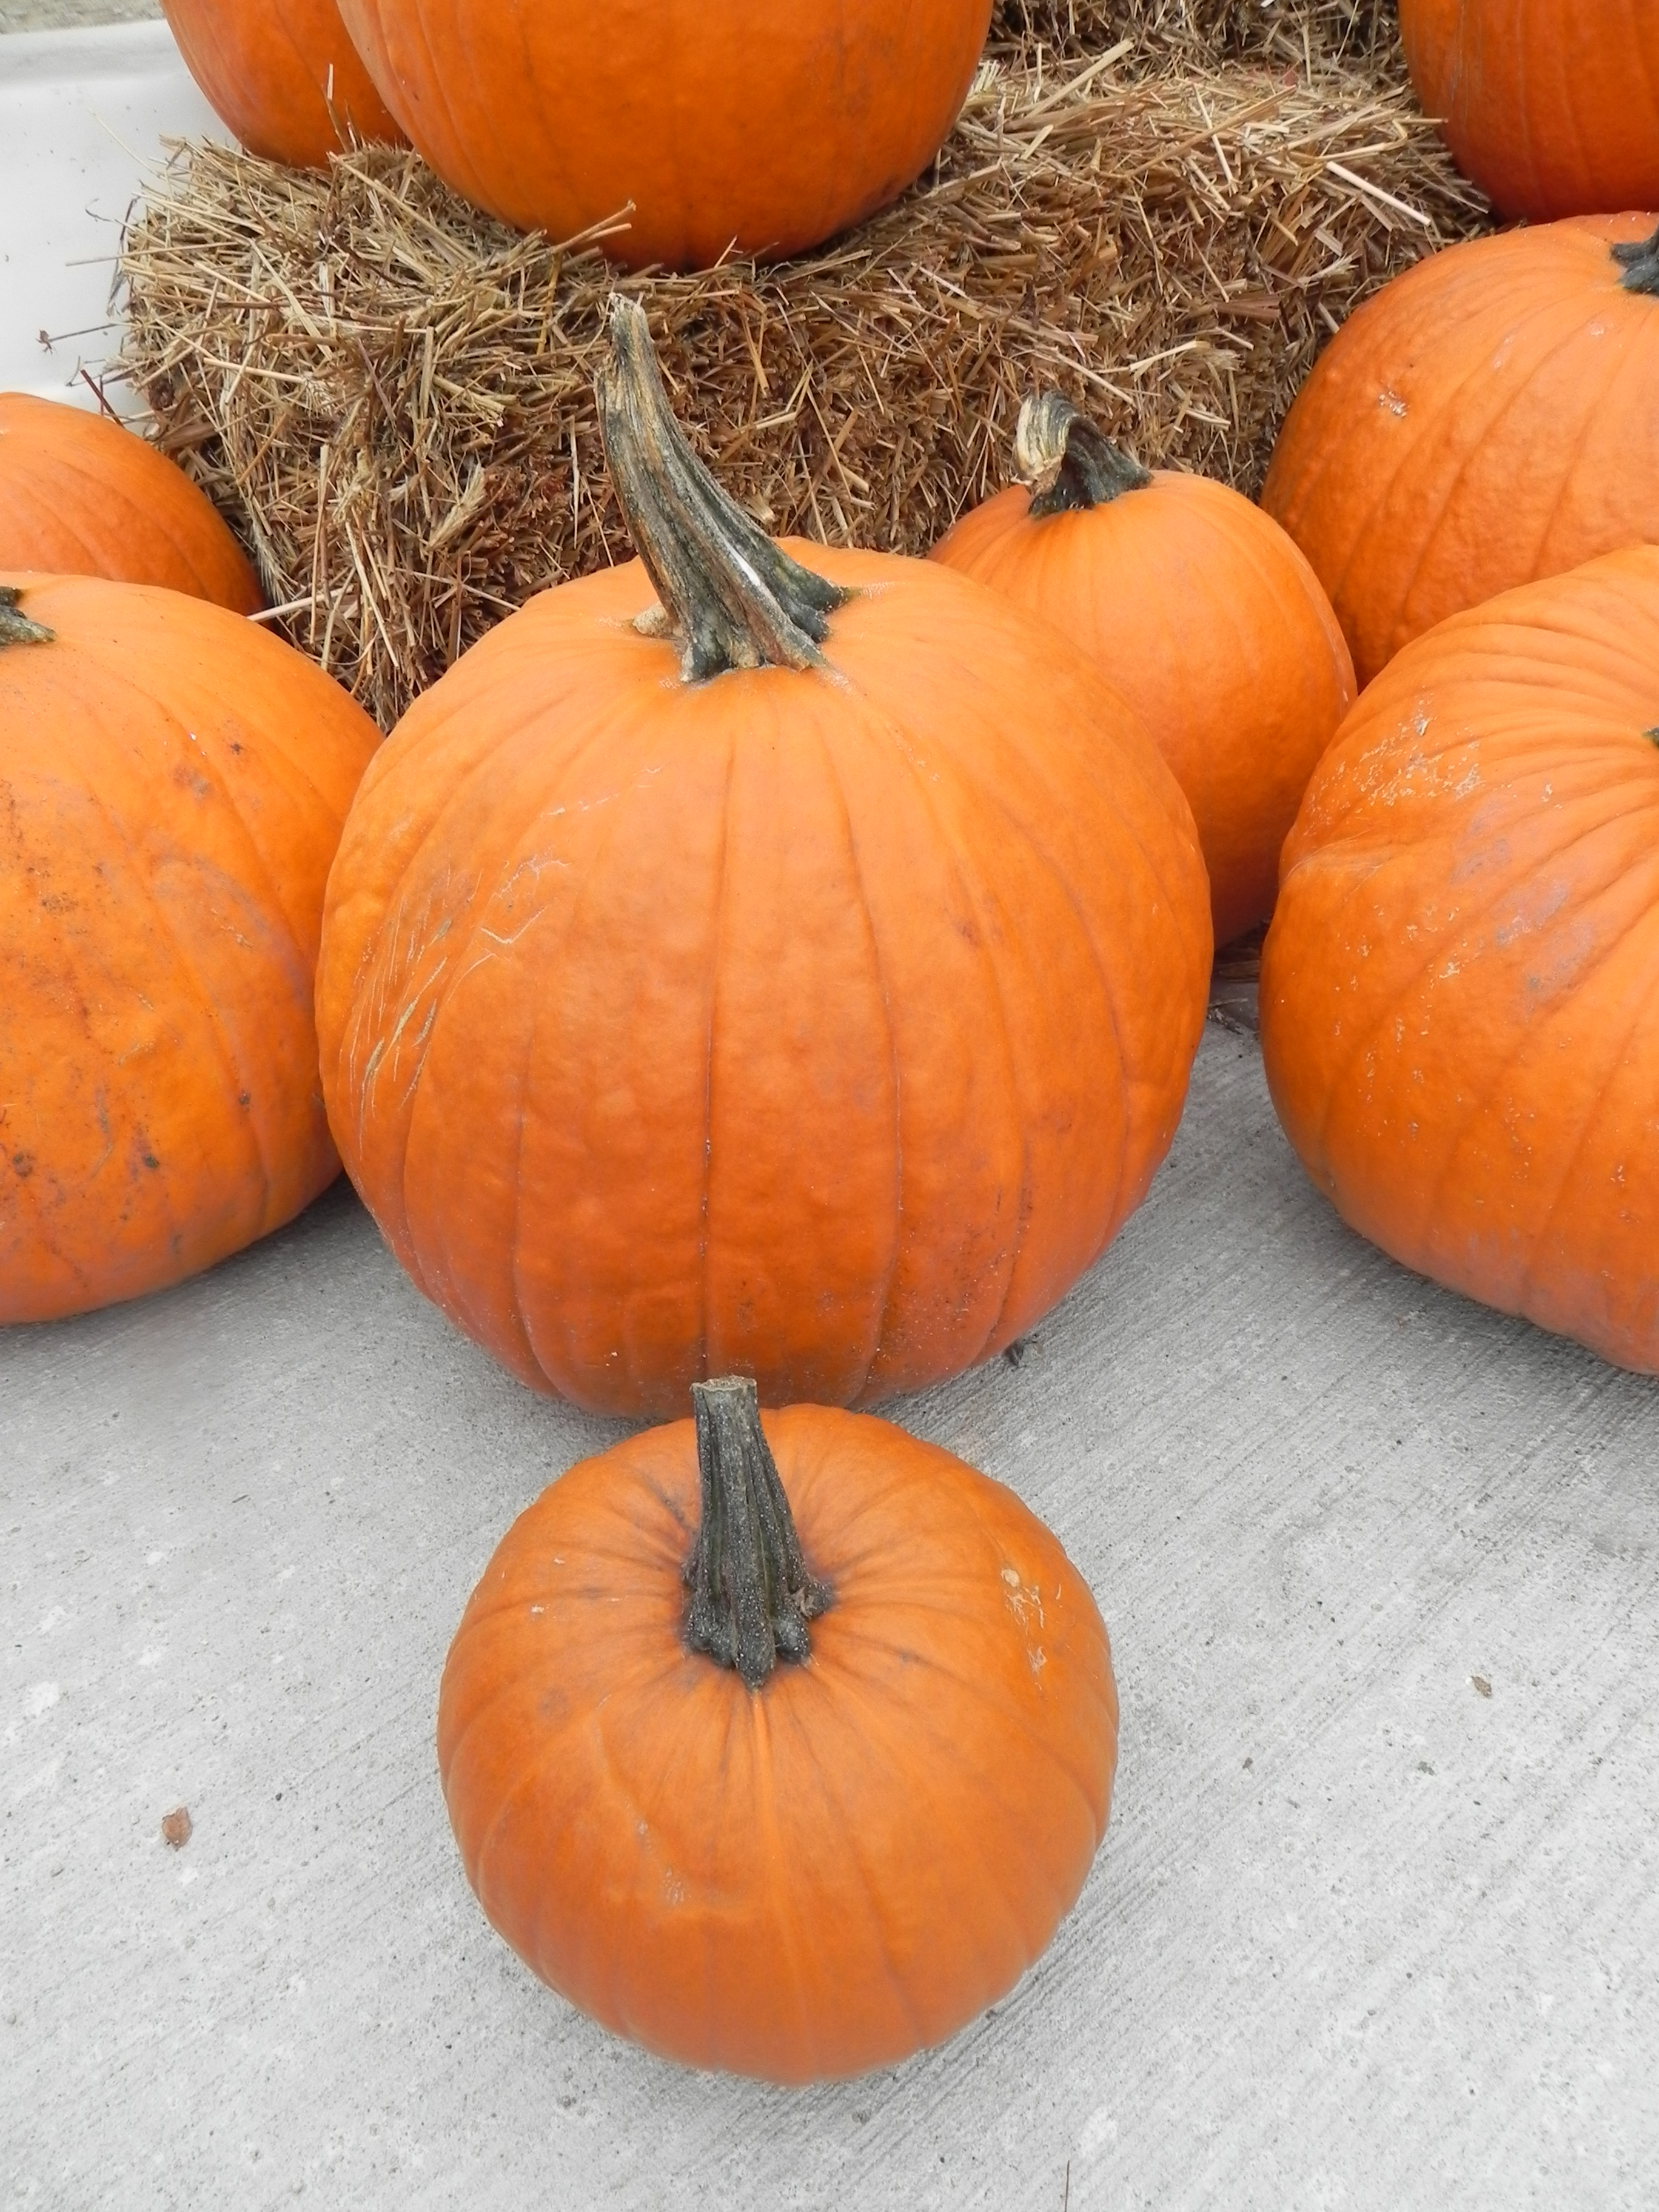
Pumpkins are amazing plants. Intriguing and delicious, they are one of America’s gifts to world food and are fun to grow and eat.

Pie pumpkins are smaller with thicker stems.
Pumpkins were domesticated and cultivated by Native Americans long before Columbus. They valued them as a nutritious food that would keep well into the winter. Not only is the meat nutritious but also the seeds are packed with important vitamins and minerals
Pumpkins exist in enormous diversity. Today, most people buy one in the fall and carve it for Halloween, or just use it as an ornament. Then it gets tossed out. Most sold for carving and decoration are field or cow pumpkins. They are edible, but the ring of flesh outside the seed cavity is usually thin and the meat is stringy and needs straining. Transforming cow pumpkins into pie takes work.
We grow and buy pie pumpkins. Most pie pumpkins are small, but not all small pumpkins are pie pumpkins. Usually pie pumpkins have an especially thick stem and are heavy for their size. Bred to have dense, non-stringy, bright orange flesh, they are relatively easy to process. Pie pumpkins may be small but they are as interesting and ornamental as the cow variety.
Growing pumpkins is a snap. Buy pie pumpkin seed and plant them in hills after spring’s last frost. Pumpkins love rich soil, and working compost into the hill will invite enthusiastic growth. We don’t even weed our pumpkin patch and only thin the young plants so there are two or three per hill. By September the bright orange fruits are ready to pick when the vines dry up.
Well cured pumpkins keep several months when stored in a cool, dry, dark place. Just don’t let them freeze.
To process pumpkin meat cut into large chunks. Place skin side up in a pan with about an inch of water. Cover. Steam until meat is tender to the fork. Drain and cool until comfortable to handle but still warm to the touch. Scoop out the cooked meat into a colander. Squash the meat through the colander into a bowl, scraping the inside and outside periodically. Store in closed container until ready to use in pies or muffins.
Although we enjoy most of our pumpkins in pies there are lots of other ways to eat them. Chunks of their flesh can be added to stew. Hollowed out and baked they can become a container for a savory soup or a sweet dessert when sprinkled with spices and brown sugar.
A favorite Yankee family pie recipe from Yvonne Fellows that has been in our family for three generations. Recipe makes two pies:
2 ¼ cups processed pumpkin meat
¼ cup molasses
¾ cup sugar
(Try Penzeys Spices for superb flavor)
1 ¼ tsp cinnamon
¾ tsp ginger
3 to 4 medium eggs to bind the meat
3 cups milk
Mix ingredients in order given. Bake in unbaked crusts: 400 degrees for 25 minutes (this gives you just enough time to clean up dishes). Turn down heat to 350 about 50 minutes or until done. Test for doneness by inserting a table knife into the center of the pies. When it comes out mostly clean, pies are done. Turn off oven. Let pies set in oven if you wish. Serve warm or cold plain or with real vanilla ice cream.
Granny’s Pumpkin Puffs from Jacqueline Hull in Virginia
Mix the dry ingredients together:
1 ½ cups flour
2 tsp baking powder
½ cup sugar
(Try Penzeys Spices for superb flavor)
½ tsp cinnamon
½ tsp nutmeg
Cut in ¼ cup shortening to the above
Mix the wet and cut into the above mixture until just moist. Lumps are OK.
1 beaten egg
½ cup cooked pumpkin
½ cup milk
Fold in: ½ cup raisins.
Fill muffin tins 2/3 full. Sprinkle 2 TBSP sugar over the batter. Bake 400 degrees 15-20 minutes.
by Winding Pathways | Oct 14, 2015 | (Sub)Urban Homesteading

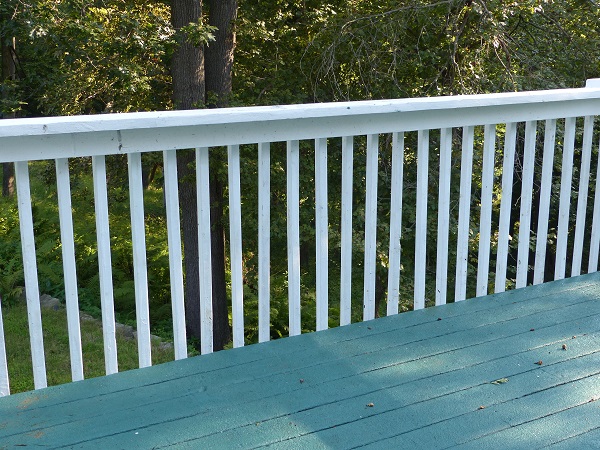
Old railings on back deck limit view.
Early this spring we sat on our front porch staring at needed work and a home dilemma.
Our front porch and back deck were enclosed in traditional wood railings and balusters. About every other year the paint peeled. Scraping and repainting were tedious and time consuming chores that we didn’t want to do repeatedly. Also, each side of our home offers gorgeous views of oaks, maples, and a prairie plus the wildlife that visits our feeders and yard. From indoors, seeing through the heavy wood balusters and rails was hard.
Instead of scraping and repainting again, we paid a visit to Ogden and Adams, our neighborhood home store, and ordered an aluminum railing system for the front porch and a cable rail for the back deck. Then we ripped out the wood and installed the new porch railings ourselves. We’re not carpenters so we watched installation videos and read the instructions that came with the materials. It took time figuring, cutting and assembling, but we were able to successfully install the railings ourselves. And once in place we were delighted with their appearance and the amazing ability to see into the yard. These products are carried by most major lumberyards and home stores.

After installation. Easy to see through.
The white aluminum rails and balusters should eliminate all future need to scrape and paint, but even better is the increased visibility they offer. The old balusters were 1 ½ inches across, while the aluminum ones are but 3/4ths of an inch. That may not sound like much but the front porch has nearly 60 balusters, meaning that we now have about 40 more inches of clear unobstructed vision. Essentially the new ones offer only half the visual blockage of the old wood ones. This lets more light enter the house and more cool breeze to waft through on hot summer days. From the road the difference is indiscernible. The impact of the cable system on the back deck is even more dramatic. The tightly stretched stainless steel cables are nearly invisible and are remarkably easy to see through. When we peer at our bird feeder our eyes focus in the distance and the nearer cables become a mere shadow.
We’re delighted with our new railings. Safe, low maintenance, attractive, and easy to see through!
by Winding Pathways | Aug 15, 2015 | (Sub)Urban Homesteading, Energy Efficiency, Preparedness
Nothing is as cozy as basking in wood stove’s warmth on blustery January nights, but planning efficient and safe stove operation is a year round activity. Well before the first frost we have our chimney cleaned and check the stove for safe operation.
August’s humid heat is a great time to anticipate plunging fall temperatures. Cool air is only a month away to be followed by frigid winter blasts. Now is the time to check the wood stove and clean the chimney. When few other people are thinking about winter.
Chimney fires are one of the great dangers of burning wood. These happen when creosote builds up on the inside of the chimney walls. This crusty stuff is flammable and can be ignited from a hot burning stove. Flames roaring up the chimney are terrifying and often set the house on fire.
At Winding Pathways we do these things to reduce the odds that our chimney will catch fire:
CLEAN AND CHECK: In late summer we hire a professional sweep to clean and inspect our stove and chimney. A chimney sweep will remove creosote and inspect the stove and chimney to make sure they are safe. So, we start the cool season with a whistle clean chimney.
BURN CLEAN, SEASONED WOOD: Creosote buildup is most frequently caused by burning wet or dirty wood. Wood from most pines and some other species burns with much smoke that creates creosote. Except to use a little pine for kindling we avoid burning it and other wood from coniferous trees. In general wood from trees that drop their leaves each fall, called deciduous trees, burns cleaner than pine, spruce, and fir, but it must be well seasoned.
A living trees’ wood contains an amazing amount of water needed for tree health. Wood from a recently cut live tree doesn’t burn well. It hisses as hidden water evaporates from the fire’s heat. Boiling water out of wet wood consumes energy that doesn’t end up as heat in the home and creates a cool fire that’s likely to deposit creosote in the chimney.
Wood needs to be properly seasoned. To make sure we burn dry seasoned wood we do these things:
- Split all firewood. Wood dries from the cut surface, rather than through the bark. Splitting exposes much more wood to the air than unsplit pieces, so it dries quicker and more thoroughly. Generally the smaller the piece of wood the faster it will season.
- Keep firewood off the ground and under cover. We season firewood on pallets to allow air to circulate underneath. Most of our wood is stored in a woodshed with excellent side ventilation and a solid roof to keep off rain. The rest is stored under a tarp in a breezy place.
- Give it plenty of time. Six inch diameter pieces of unsplit firewood could take up to two years to thoroughly cure, even when stacked in a dry place. If split and if stacked in a dry breezy place seasoning can take as little as four to six months. Seasoning usually means cutting wood this year for burning the next year’s winter. Not the on-coming winter.
- Pay attention to species. We’ve learned to identify species by looking at cut wood and also the tree. The amount of energy held in a piece of wood varies greatly by species. For example a chunk of hickory contains about twice the heat as the same sized piece of cottonwood or aspen. We don’t turn our noses up at woods that yield less heat. Plenty of cottonwood, silver maple, box elder and aspen have kept us warm. These species may hold lower amounts of energy than oak or hickory but their wood burns cleanly if properly seasoned. Of course, we prefer oak, hickory, locust, or sugar maple but if other species are convenient and available we cut, season and burn it.
OPERATE THE STOVE CAREFULLY: Most creosote forms when stoves are allowed to burn at cool temperatures. This normally happens when fueled with unseasoned wood or when the stove’s air intake is reduced. Choking down the air intake so a fire smolders all night is a recipe for creosote buildup. We run our stove with a brisk hot fire all day and never choke down the air intake. If our fire goes out overnight we simply light a new one the next morning.
FOR INFORMATION
To find a certified chimney sweep check Certified Chimney Professional.
A good chart of wood energy content by species is at Chimney Sweeps Online.
by Winding Pathways | Jun 21, 2015 | Chickens, Garden/Yard, Nature, Trees/Shrubs
As we welcome summer we also begin to indulge in Iowa’s natural harvest of berries and cherries. Mulberries must be ripe because purple colored bird droppings mark lawns and sidewalks. Scat from raccoons and coyotes are full of seeds. Mulberries are great to eat out of hand and we get great laughs from the purple tongues and fingers that result from our munching them.
Black Raspberries, or “Black caps”, are ripening. Red raspberries big as your thumb fall into your hands and cherries hang tantalizingly just beyond reach on the most slender branches. If the weather stays warm but moist, we will have excellent blackberries come mid-July into August.
Squirrels and birds naturally have an advantage over humans and our chickens make sure that they clean up any cherries that escape the squirrels. But we are out with the best of them harvesting the fruits of an Iowa summer, indulging in fresh berries by the handful and freezing some for winter.
Take time to walk a trail and have fun with summer’s bounty.
by Winding Pathways | May 4, 2015 | (Sub)Urban Homesteading, Amphibians/Reptiles, Garden/Yard, Nature
The annual evening toad serenade has begun! From May into summer rural and urban folks can enjoy the loud trilling announcing toad lovemaking season. Nature’s summer music.
As amphibians, toads require standing water to reproduce but unlike many frogs they don’t need watery abundance. Toads lay their eggs in small pools that often dry up by summer. Eggs hatch quickly into tiny black tadpoles. While bullfrog tadpoles take two years to change into adult frogs, toad tadpoles are speedsters that transform into tiny hopping miniature adults by mid-summer. Often hundreds of these tiny creatures can be spotted seeking cool damp places to live.
Toads are voracious insect eaters, and gardeners delight in having them live under squash vines or tomato plants. Some people even construct tiny toad homes to encourage them to live in the garden.
We’re lucky to have a big toad living in a shed near our garden. His home is damp and cool with plenty of insects to keep him well fed.
According to the National Wildlife Federation, when pestered, toads eject a watery toxic substance from the parotoid glands. The toxin discourages dogs, raccoons or other hungry varmints intent on a meal from eating them. Few predators bother the placid toad. This bufotoxin can cause an allergic reaction in people. But humans do NOT get “warts” from toads.
Homeowners can encourage toads to take up residence. Building a small pond creates a toad magnet and maintaining a few damp places in the garden will provide toad homes. Avoid insecticides and, thus, encourage worms and insects for these intriguing animals to gorge on.
Kids love toads. When our children, Dan and Nancy, as small children delighted in watching them in our small backyard pond. Toads help transform a boring yard into a wondrous one!