Many homeowners harvest beans, squash, and tomatoes from their garden. Some collect delicious eggs from a small
backyard flock. Too few harvest one of life’s free necessities – Rain Water!
We set up five rain barrels at Winding Pathways a few years ago. They are so handy we don’t know why we didn’t start harvesting rain years ago. Rain barrels are relatively inexpensive and easy to set up. Water from the barrels irrigates thirsty gardens, provides drinking water for our backyard hens, and is handy for rinsing off dirty hands and tools when working outside.
Tap water costs money. Rain water is free. It’s delivered by nature without chlorine. Too many homeowners swish rainwater down storm sewers and pay their city for tap water to irrigate.
Rain barrels yield free water but also create social and environmental benefits. They reduce pressure on municipal water systems and wells during droughts and reduce erosion and flooding caused by runoff.
A rain barrel is simply a container that collects and stores water falling on the roof. A faucet positioned low on the barrel makes filling a bucket or attaching a hose easy.
They are hardly a new technology. People have been catching and using rain for thousands of years, especially in arid areas. Relatively new are myriads of lightweight attractive barrels on the market, ranging from plain and simple to highly decorative. Most hold about 50 gallons. Do it “yourselfers” can easily make a rain barrel from a 55 gallon drum and fittings sold in any hardware store.
Most first time rain barrel users are astonished at how much water falls on the roof during even a minor shower. For example 625 gallons of rain falls on a 1000 foot roof during a one inch storm. That would fill nine or ten typical sized barrels, and most houses these days are much larger than 1000 square feet. Even during Iowa’s occasional droughts enough occasional showers fall on our roof at Winding Pathways that we always seem to have water in our five barrels.
What’s Needed to Harvest Rain?
Setting up a rain barrel outside a home that has gutters and downspouts is easy. All that’s needed is the barrel itself, a stand to elevate it, and a way to point the downspout so water goes into the top of the barrel.
The Barrel: Many websites detail how to make a rain barrel from common materials. Simply GOOGLE How to Make a Rain Barrel and several excellent well illustrated instructional sites appear. Manufactured rain barrels can be purchased in big box stores that sell yard and garden equipment. They can also be ordered from numerous places online.
The Stand: A stand gets the barrel up off the ground. Normally a hose fitting is situated near the barrel’s bottom to allow complete draining. We made stands from lumber scrounged from construction site dumpsters. They are about 18 inches tall. Placing the barrel on several cinder blocks is even simpler and requires no carpentry. Remember that a rain barrel holding 50 gallons of water weighs around 400 pounds. Stands must be stout.
The Downspout: Most downspouts extend from the gutter to the ground. Situate the stand and rain barrels below or near a downspout. Common soft aluminum or plastic spouts are easy to cut with a hacksaw. Cut it off above the height of the rain barrel so water falls directly into the top of the barrel. Or, if the barrel needs to be set to the side of the downspout buy a 90 or 45 degree angle elbow from a hardware store and attach it so water reaches the barrel. Be sure to drill a few holes in the joint and secure it with sheet metal screws.
Where to Locate the Barrel. Obviously a rain barrel needs to be located near a downspout, but most houses have several of them. Put the barrel as close as possible to the garden or wherever the water will be used.
Hooking More Than One Together. Most people start with just one rain barrel and then discover that it fills quickly in just a light rain. And, it’s easy to use all the water quickly. The solution is simple. Set up several rain barrels in a way that once the first barrel fills water flows through a small tube into the second, third, and any subsequent ones.
Rain Barrel Maintenance. Barrel maintenance is important but simple. Every five or six weeks we drain our barrels, brush the inside to dislodge the slimy material that forms on the plastic, and wash it out with tap water from a hose. Ice can crack a rain barrel, so in late fall we drain ours, turn them upside down for the winter, and put a rock on top (actually the inverted bottom) to keep the wind from blowing them away.
A Caution. Most roofs are constructed of nontoxic materials, but some may leech toxic chemicals into rainwater. Most cedar shakes have been treated with chemicals so don’t harvest water from such a roof. It’s best to wait three or four months after installing a new asphalt roof before collecting rain.
It’s exciting to bring fresh eggs into the kitchen from a flock of backyard hens, and another satisfying delight of the yard is the delicious beans, chard, and other vegetables that come from the garden. Harvesting free rain after a summer shower is another pleasure offered by a wondrous yard.
A few years ago Lynn and Mike Ruck, owners of Rainwater Solutions, helped the Indian Creek Nature Center in Cedar Rapids, Iowa mount a major effort to encourage residents to buy and install barrels they make. Eager residents retrieved barrels they had ordered from the back of a huge semi-truck, and soon nearly 1000 residents began harvesting water.
Many companies make and sell excellent rain barrels. We use ones made by Rainwater Solutions at Winding Pathways, and they’ve served us well. One of their models, called The Moby, holds 65 gallons while its slimmer cousin, The Ivy, holds 50.
Rain Water Solutions rain barrels are made in the USA of 100% recycled content. It is their mission to work with government agencies and non-profits to use rain barrels as an education / outreach tool for water conservation and water quality issues. They also design, consult, and install above and below ground rainwater harvesting systems. For information check their website at www.rainwatersolutions.com.
Winding Pathways has had fun this spring working with neighbor children on syruping. While the season here in Iowa has ended, in more northern and Eastern areas it is still in full swing. The 2015 syruping season may last longer in the north east because of the deep snow and continued cold. Take in the excitement of a syrup festival in your region and take time to tap a tree in your backyard. Things will pop fast, so go outside and play!
Maple syruping is captivating. Perhaps because the process is fascinating, it’s one of the first signs of spring or it conjures up childhood memories reading books about syruping or seeing old Currier and Ives prints of Native Americans or hearty pioneers sugaring off.
Alhough it’s a historic process, tapping trees and making syrup is a fun family activity and a great way to pique childhood curiosity about history and science. Syruping is a blend of botany, weather, science, history and all topped off with delicious eating.
Native Americans invented maple syruping long ago. Before honeybees were imported from Europe and sugar became a trade item maple syrup was THE ONLY sweetener they had. Typically Native Americans made maple sugar by slicing the bark of trees in late winter, catching what sap they could in bark or wooden containers and boiling the sap in large, hollowed out wooden containers by dropping fire-heated rocks into the liquid. They used this cumbersome method because until Europeans arrived they didn’t have metal. Syruping was plenty of work.
When Europeans settled along the Atlantic coast they quickly developed a taste for maple and supplied Natives with metal buckets, pans, axes and spiles that enabled them and European settlers to make syrup efficiently. It was the main American sweetener until a cane sugar tariff was lifted in the late 1800’s. Today maple syrup is a delicious, but expensive, luxury.
Modern producers use plastic tubes to channel sap from their sugarbush (maple grove) to their sugarhouse, where it’s processed into syrup by eliminating water in ultra-modern reverse osmosis machines followed by some boiling. It’s an efficient, but not nostalgic, process.
Making syrup from a backyard tree using old methods is fascinating fun. It’s now late winter. Soon days will be above freezing and sap will flow. Syruping season is upon us. Assuming there’s a maple tree in the yard most families have many of the items they need to make a small batch of syrup. Here’s how:
What you need: It’s simple. You need a maple tree or two of any species. Sugar, black, silver, red and European maples produce sweet sap. Even common box elders, which are true maples in disguise, yield sap that makes delicious syrup. The tree needs to be at least 10” in diameter but bigger ones are better. Other needs are:
• A drill and bit to create a 7/16th or ½ inch diameter hole three inches deep into the tree.
• A homemade or purchased spout, or “spile” as it’s called in syruping country.
• A container to catch sap. Plastic milk jugs work!
• A container to collect and store sap.
• A way to boil off about 40 gallons of water to make one gallon of syrup.
Where can syrup be made: Although New England, Canada and the Lake States are traditional syruping regions it can be made anywhere maples grow and the right weather conditions occur. Syruping is possible from Alabama to North Dakota, east to the Atlantic, and even from street trees in western towns.
When are trees tapped: Maples drip sap only when nights are below freezing followed by daytime temperatures above 32 degrees. Ideal conditions are several days in a row with clear, cold frosty nights followed by sunny warm days. Traditionally syruping starts around March first in the north but can be earlier down south. The season ends when sap stops dripping as night temperatures remain above freezing. The sap flow can be as short as four or five days or as long as six weeks. It all depends on the weather.
How to tap a tree: In late winter, just before warm days are expected, gather a drill, bucket and child and tap your backyard tree. If done properly it does no harm to the tree. A young 10” diameter maple is good for just one tap, but a 30” diameter veteran can support up to three taps. Use either an electric drill or be traditional and use a carpenter’s brace and bit. Drill at a slight upward angle two to three inches into the tree. A short piece of wire can be bent into a hook to drag wood chips out of the hole. Tap in the spout, or spile, and attach the bucket or milk jug to catch sap. If the weather is perfect sap will flow as soon as the drill passes through the bark.
Spiles and collection supplies can be purchased but here’s how to make your own:
Step One: Find a patch of sumac. These common shrubs often grow along roads. Cut off a three foot section about a half inch in diameter with pruning shears. Then cut it into pieces about four inches long. Sumac has thick soft pith. Either poke it out with a piece of stiff wire or drill it out to create a tube. Taper the end that will go into the hole in the tree by whittling with a pocket knife. Gently tap your spile into the hole.
Step Two: Use the pocket knife to cut a small hole in the neck of a clean gallon milk jug just above the handle. Slip the hole over the end of the spile. If you’ve done it right the jug will stay in place and is strong enough to hold a gallon of sap without pulling out of the tree.
If the weather’s right the jug will fill in just a couple of hours. Empty the sap into a storage container. It’s best to begin boiling right away but cold sap will keep a few days. But, there are other uses for maple sap than boiling into syrup. Fill a teacup with boiling sap instead of water and add a tea bag. The delicious beverage will have a hint of maple flavor. Some people drink sap as a spring tonic.
Step Three: Now comes processing. Nothing is added to sap to create syrup but about 40 parts of water must be evaporated to make one part syrup. It can be boiled in a saucepan over the kitchen stove, but that puts lots of sticky steam into the house. Boiling is best done outdoors over a wood fire or propane burner. Large shallow pans help speed boiling. Boil for several hours. The syrup is ready to eat when:
• It is golden colored with delicious sweetness.
• It slowly dribbles off a spoon dunked in hot syrup and suspended over the pan.
• It boils at seven degrees Fahrenheit hotter than boiling water.
Serious sugarmakers use more precise ways to tell when their syrup is done but these simple tests work for a small quantity. Finished syrup has sediment at the bottom of the container that looks like fine sand. It’s mostly calcium that’s perfectly fine to eat, but it can be filtered through cheese cloth to remove it. Refrigerate your precious syrup to prevent spoilage.
Commonly asked syruping questions:
Q. Will it hurt the tree? A. Only if the tree is overtapped. Only drill one hole in a 10” diameter tree. Up to three or four taps are fine in a massive maple.
Q. Do I plug the hole in the tree at the end of the season? A. Nope. Just pull out the spile. The tree will heal itself.
Q. How much syrup will one small tree with one tap produce? A. It all depends on the weather. During a long season a small tree could yield up to a half gallon of syrup, but during a short season it might yield only a cup or two. The long term average is about one quart of syrup per tap.
Sources of Syruping Equipment and Information
Simply Google Maple Syruping and the computer’s screen will be filled with places to buy equipment and information on how to tap trees and make syrup. One of our favorite sites is Tap My Trees.
Winding Pathways urges people to go outside and have fun. Few backyard activities are as fun as making a batch of maple syrup from your own tree.
Although the northern and mid sections of the US are still bitterly cold and blanketed by inches of snow or ice, the south is beginning to warm up. That means the Greening of Springtime!
Following a long winter, a plate of steaming ultra-fresh greens from the yard is a delicious and nutritious treat.While most Americans consider stinging nettles weeds, Europeans enjoy them as an early spring food that is delicious, abundant and free for the picking.
Stinging nettles are one of the first plants to green up in early spring. They pop from the ground shortly after the snow melts and are ready to harvest about the time gardeners plant spinach, lettuce and other early cultivated greens. Winding Pathways is in Iowa, and we can count on harvesting nettles by early April, but the season starts sooner in warmer climates.
Nettles grow in all states except Hawaii and are common across much of Europe, Asia and even Northern Africa. They thrive in rich moist soil where there is partial sun. Seek them on the edge of suburban lawns and along rivers and streams. Nettles have high nutritional value and are sold in tablet or liquid form in vitamin shops. As described in the International Journal of Food Science, nettle “Results show that processed nettle can supply 90%–100% of vitamin A (including vitamin A as β-carotene) and is a good source of dietary calcium, iron, and protein.”
Stinging nettles are named for numerous tiny spines that can inject a chemical into the skin. The sensation is uncomfortable but quickly fades and is not dangerous. Some people call the plant the “seven minute itch”.
Before collecting nettles, or any other wild food, for dinner be sure to positively identify the plant. Photos of nettles can be found online and are in nearly every wild food book.
There is a trick to harvesting them. Use gloves to protect the hands and scissors to snip off the top few tender leaves. Alternately, gently put your thumb and index finger just below the top few leaves and slide them up, pinching off the top, rinse and drop a few cups of them in water. A few minutes of boiling neutralizes the sting and results in a delicious high protein vegetable. Enjoy them covered with melted butter and a dash of vinegar. Save the water that nettles have been boiled in as a stock for soup or to drink as a delicious tea.
Pinching off tender young leaves encourages the plant to produce new ones, so by harvesting nettles from the same patch about every week the collecting season is prolonged. Don’t even try eating tough mature nettle leaves or stems. Early settlers once used the fibers of these rough stems to weave into a linen-like cloth.
By early summer in the upper Midwest, the nettles have “gone by”. But, we let them grow up because many species of butterflies are attracted to the yellow-greenish flowers of the nettles. Stinging nettles are a wonderful plant that we enjoy having on our property at Winding Pathways.
Every once in a while every homeowners needs to cut wood. Hedges overgrow. Branches break and land in the driveway. Trees need pruning. And sometimes firewood must be cut.
There’s been a recent evolution in saws that helps homeowners manage trees and shrubs. Muscle powered types have been around for years. Gasoline chainsaws appeared in the 1950s and keep improving in ease of use, safety and efficiency. Recently, cordless electric saws entered the market. Each type saw has strong benefits and some drawbacks.
USING MUSCLES
If you just need to cut a few fallen branches, don’t buy an inexpensive chainsaw at a big box store. For small jobs a sharp muscle powered saw is often best.
Here are some advantages:
Much less expensive than a chainsaw.
No need for gasoline. Human power works and yields exercise!
No noisy motor to barrage the air or break down.
Need little storage space and last for years.
Blade can be re-sharpened or replaced on a bow saw.
Here is one disadvantage:
Although generally safe, they can inflict a nasty cut.
Two types of commonly available muscle powered saws are useful in the yard.
Bow saws look alittle like an old fashioned bow without the arrow. A tubular steel frame forms the bow and a replaceable blade is the “string”. They come in sizes based on blade length from 12” to 36”. Medium sized ones are best for most backyard chores. Bow saws are ideal for cutting fallen branches into firewood. A sharp one slices through a three inch diameter branch with ease. The downside of bow saws is their somewhat ragged cut. That’s hardly a problem with firewood, but a clean cut is important when pruning living trees. That’s where a pruning saw shines.
Pruning Saws look somewhat like carpenter’s hand saws but normally have larger teeth and sometimes a curved blade. They are designed to cut cleanly with little tearing so the tree heals easily.
Muscle powered saws are efficient IF THEY ARE WELL DESIGNED AND SHARP. Buy a quality saw and keep it sharp. Store it in a in a dry place where it won’t rust. For long term storage, for example over winter, put a light coating of oil on the blade to reduce odds of rusting.
A SHORT PRIMER ON CHAINSAWS
Chainsaws come into their own when lots of wood needs to be cut, especially if it is of large diameter.
Early model saws from the 1970s and earlier were heavy, noisy and vibrated severally. But, newer ones are easier and more comfortable to use. They also incorporate safety features lacking on old timers.
A chainsaw’s cutting teeth zip along at about 60 miles per hour. Every tooth passes the same spot on the bar about 20 times a second! When properly sharpened they roar through wood but can do instant and major damage to human flesh.
Using a chain saw properly and safety takes skill. Even the most experienced operators wear safety equipment and always remember to work safely. Too many people who have never used a chainsaw buy one, rev it up and begin cutting without getting proper training or using proper safety equipment. BE SAFE!
Chainsaws range from small lightweight inexpensive homeowner models to heavy powerful logging machines. A motor powers a sprocket that drives a tooth studded chain round a “bar”. Most bars range from 14 to 20 inches. Saws squirt oil from a small tank into the chain to reduce friction and heat.
Buying A Chain Saw: Most chainsaws sold by big box stores are, essentially, throw away models. They are inexpensive and fine for small infrequent use, but for long term durability, ease of use and repair, invest in a quality saw. Before you buy ask if the store has a repair department. If not buy your saw somewhere else. Quality saws are sold at specialty stores that also sell safety equipment, spare parts and maintenance supplies. Chances are the sales person is a seasoned saw operator who will coach a buyer on operating the saw, safety and maintenance.
Remember those cutting teeth go 60 miles an hour! BE SAFE. Always wear ear, head and eye protection, leather gloves, leather boots and saw chaps. Safety equipment can’t prevent all accidents but it can help reduce injury should something go wrong. About 40% of chainsaw injuries are to the legs. Chaps are like an apron made of materials designed to slow or stop a chain should it impact a leg.
Saws are noisy and can permanently damage hearing. Muffs that fit over the ears or small plugs that fit inside ears are essential. Some people choose to wear both types of hearing protection at the same time for ultimate noise reduction. Safety glasses help protect eyes from debris that sometimes flies off the saw.
Head injuries account for about half of chainsaw deaths! Wearing a stout hard hat reduces odds of a head injury. Some operators use a hard hat that has a face shield and ear muffs attached.
ALWAYS BE SAFE. Some other safety tips include:
Have a first aid kit and cell phone handy.
Regularly inspect safety equipment. Replace anything that seems faulty.
Keep the saw sharp and well maintained
Take breaks to ward off fatigue.
Saw when others know you are sawing and can help if needed.
Check the chain brake before starting the saw. If it is in the forward position the chain should be locked and not move.
Chainsaws are potentially dangerous. Using one efficiently and safely is a high skill that comes with a learning curve. In some areas chain saw classes are available. Websites, books and You Tube videos help a novice learn saw techniques and safety. Watch and read before starting the saw! Videos and books can also help a novice learn how to properly sharpen their saw’s teeth.
Probably the best way to learn saw operation and maintenance is to find an experienced mentor and spend time working with him or her.
ALWAYS BE SAFE. Many scenarios can lead to chain saw accidents but two are too common.
One is haste. It’s tempting to fire up the saw without donning safety equipment and hurriedly work when there’s only a branch or two to cut. Always don safety equipment and take your time. The second scenario is fatigue. Wood cutting is hard work and wise experienced loggers in superb physical condition recognize when they are getting tired and take a break.
Employees of the U.S. Forest Service often use chain saws. A standard greeting between two of their staff isn’t to say, “Hi” or “goodbye”. They say “BE SAFE”!
One gorgeous summer morning high in Idaho’s mountains I witnessed a serious chain saw accident that could have been completely prevented. Our crew was all seasoned operators and typically we took a mid-morning break to rest and sharpen saws. We were on an old logging road and one of our crew was sharpening his saw. We heard a yell and looked over to see him clutching his hand. Blood curled down his forearm from a deep cut on his palm. A crew member applied pressure, put on several layers of gauze, and taped it tightly. I was appointed to drive him to the nearest hospital, which was an hour distant. The doctor sewed the cut shut.The cut happened when his hand slipped while filing a tooth. The saw was not even running. Had he worn leather gloves there might have been a cut glove but an uninjured hand.
LESSON: Wear leather gloves, even when sharpening a saw.
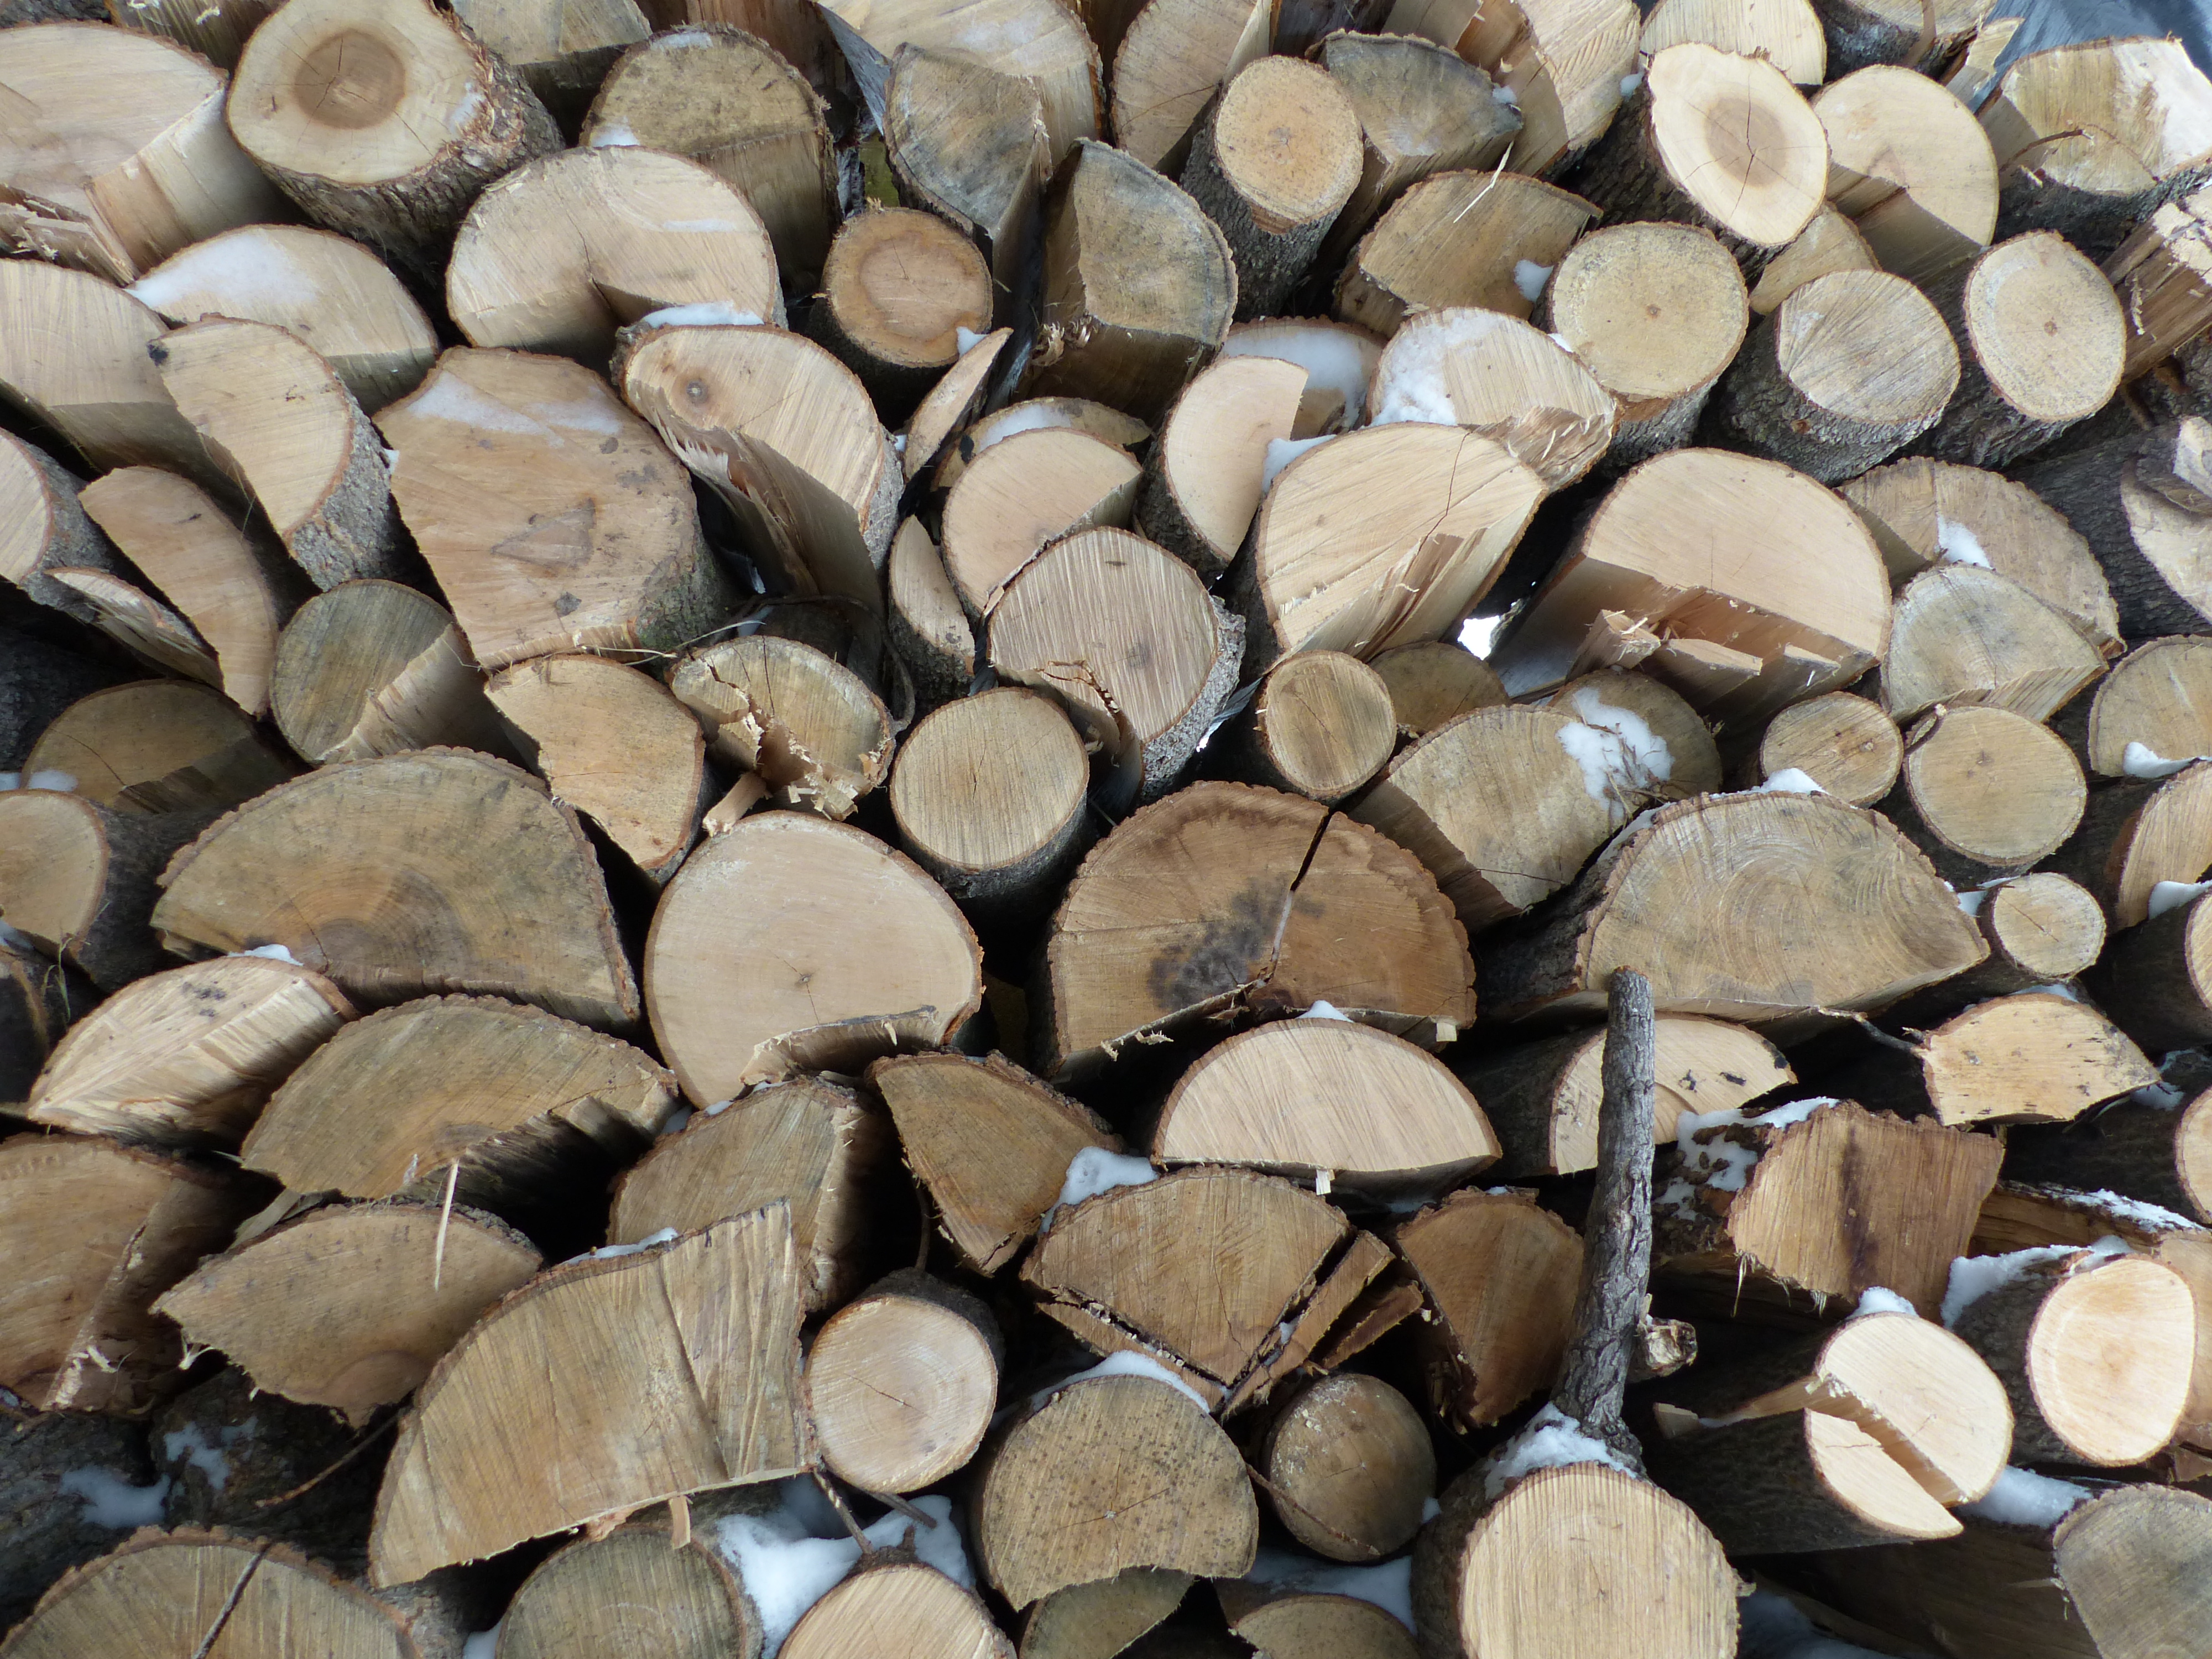
Wood carefully cut, split and stacked.
BATTERY AND ELECTRIC CHAIN SAWS
In recent years many new types of electric saws have entered the market. Most corded models are designed for light work, not cutting many cords of firewood. They are lightweight, generally less expensive than gas saws, quiet, cut well and need no gas, although they require oil to lubricate the chain. Their downside is the tether, so they are only useful near an electric outlet.
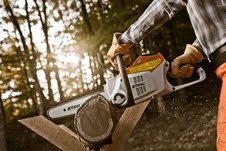
Cordless electric chainsaws saws are powered by a lithium ion battery. They are amazing machines that merge many of the benefits of gas and corded saws. Stihl and other companies sell a wide range of yard maintenance tools that operate on the same battery as the chain saw. This allows for flexibility.
Quality battery operated saws allow plenty of cutting on one charge, but for long time use it’s wise to have two batteries. When one is in use the other is on the charger. Stihl claims that a fully charged battery gives about 35 minutes of trigger time and takes about 25 minutes to recharge.
BE SAFE: SAFETY PRECAUTIONS FOR GAS SAWS APPLY TO ELECTRIC AND BATTERY MODELS
WINDING PATHWAYS AND SAWS
Winding Pathways co-owner Rich Patterson began using chain saws in 1974 when he logged on Idaho’s Boise National Forest. He had the good fortune to be mentored by several experienced saw operators. For four months he cut down huge trees and bucked them into lengths. Since then he’s used dozens of saws for firewood cutting, tidying up his yard and for removing fallen trees from trails and ecological restoration at two nature centers where he served as executive director. Over the years he has taught many people safe and effective saw use and he’s purchased and used chainsaws of many brands and configurations.
STIHL COMPANY PROFILE
by Rich Patterson
About a dozen years ago I used my first Stihl chainsaw and now that is the only brand I use. My current Stihl 290 is about eight years old and has cut over 60 cords of firewood. It’s
Safety gear and quality tools make for safe cutting of wood.
reliable, solid, easy to maintain and fixable. Only one time did I have a minor problem with it. At the store where I bought it, the staff looked it over the saw and had it running smoothly in just a few minutes.
The Stihl Company was founded by inventor Andreas Stihl in 1926 in Germany. It came came to the United States in 1974 and today makes a wide range of handy tools for managing trees, turf and other functions. Most are made in Virginia Beach, Virginia, with many components made in the United States.
Stihl’s website, www.stihlusa.com, is an amazing resource. It includes videos and articles that help teach how to start, safely use, sharpen and maintain saws and other equipment. There’s even a link to help identify tree species. The site offers excellent education and technical information about equipment.
The Internet is an outstanding resource for information on the use and care of equipment and wood characteristics among other topics. Just remember that Internet videos and blogs are only as good as the person who or company that produced them.
Few cold winter evening experiences are as pleasant as sitting before the woodstove soaking up the warmth of a fire. That heat is essentially solar energy captured by the tree through photosynthesis on past summer days and released by fire in the dead of winter.
There are plenty of good reasons to consider wood heat and lots of reasons to forget it. Heating with wood is a lifestyle that requires elbow grease to cut, move, split, and stack firewood. Wood needs to constantly be fed into the stove and ashes must be removed every couple of days. Although attractive and cozy, burning wood brings pieces of bark and dirt into the home. These can be downsides, but many people love to work with wood, and cutting and splitting are pleasures, not chores. Wood heat can also save heating money, especially if the fuel comes free.
We have two woodstoves at Winding Pathways. Years ago we ditched our romantic but inefficient fireplace and added a stove. They are much more efficient than fireplaces, meaning that more of the energy in a chunk of wood ends up making a room comfortable and less goes up the chimney.
Now is a great time to plan for wood heat for next winter. It takes time to buy a stove and have it installed. To lay in next winter’s wood supply nearly a year in advance is critical.
The wood of living trees contains water that must be removed before it will burn well. Cut and split firewood stacked in a dry breezy place takes six months to a year for evaporation to remove enough water to transform it into efficient fuel. Late winter is a great time to process wood for next winter. We like to have all of next winter’s wood ready by the end of this March.
Wood is solidified sunshine mixed with minerals. Not all wood is created equally. The energy contained in a chunk is directly proportional to its weight. Dry hickory, for example, is about twice as heavy as the same size hunk of cottonwood and contains double the energy. To learn the heat value of different tree species simply Google Sweep’s Library Firewood BTU Comparison Charts. This chart lists heat values of wood by both alphabet and heat (BTU) value.
Utah State University’s link includes heat value, ease of splitting, smoke emissions, how much a wood sparks and fragrance.
For example, a cord of Maple (Sugar) weighs 3740 pounds and contains 23.2 million BTUs. In contrast a cord of Cottonwood weighs 2040 pounds and contains 12.6 million BTUs of energy. This relationship shows a homeowner would need process and store about twice as much Cottonwood as Sugar Maple to yield the same amount of heat.
Wood is usually sold by the cord or 128 cubic feet. That’s a stack eight feet long, four feet high and four feet deep. Hickory, black locust, white oak and sugar maple are the heaviest common woods of eastern and central North America. Cottonwood, basswood, aspen and most pines and spruces are the lightest. Elm, cherry, silver maple, hackberry and ash fall in between. In a normal Iowa winter we burn about three cords of a blend of oak, black cherry and maple. We’ve burned our share of “poorer” woods like cottonwood and box elder because it was available and we were short of heavier species. Lighter wood generates wonderful heat. It just takes a lot more of it than if we had hickory or oak. Wood is our main, but not only, heat source. We have a natural gas furnace and installed a gas insert into the old fireplace. Both work well and keep the house warm when we go on winter trips and are not around to feed wood into the stoves.