by Winding Pathways | Mar 29, 2017 | Chickens, Preparedness
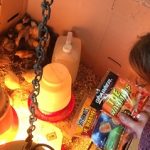
Keep hand warmers nearby in case of power outage.
We weren’t worried when a 37-degree north wind took to blowing on Saturday, March 25th. Our chicks were safe inside the barn brooder. Then, our electric power went out. Normally that wouldn’t be a problem. Our wood stove keeps the house warm without electricity and we have camp stove for cooking. And the adult chickens do well in most weather.
However, the sudden unexpected loss of electricity threatened our 50 baby chicks living in a plywood brooder under heat lamps out in the barn. Electric heat lamps normally keep them snugly warm in the otherwise cold barn.
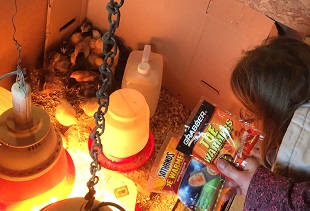
We heard about the power failure while shopping. It took a half hour to get home and we found the cold chicks huddled together in a vain attempt to keep warm. We had no idea how long the power would be off so immediately put our back up plan in place. Here’s what we did:
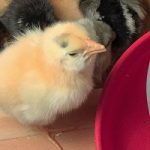
- Filled two plastic jugs with hot water and placed them near the chicks. The babies immediately snuggled up to the warm bottles.
- Tore the plastic covering off six chemical hand warmers to activate them. These are sold to farmers, carpenters, and hunters to keep their pockets warm during winter outings. They get very warm but not hot. We put them under the chicks.
The milk jugs and hand warmers didn’t warm the entire brooder, but they did keep the chicks warm enough to survive three hours until the power came back on.
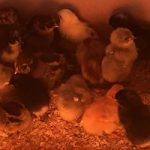
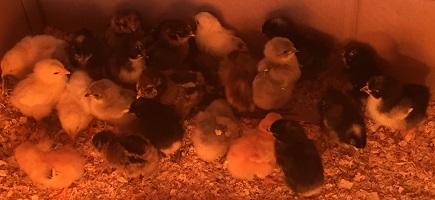
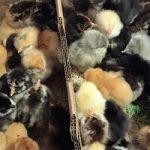
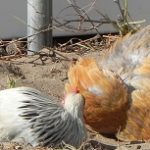
Chicks huddle together when cold.
Anyone brooding baby chicks should have a back-up plan to keep their peeping friends warm in case the electricity goes out. A couple of milk jugs and a few hand warmers can prevent a disaster.
by Winding Pathways | Mar 17, 2017 | Chickens
Baby Chicks Find a Home at Winding Pathways
Enjoying the chicks
The call from our post office came at 6 a.m. “Could you please come soon and pick up a box of peeping baby chicks,” requested the pleasant postal worker. Soon we were in the car en-route to retrieve the babies. We were excited, but the story really began months earlier.
The Girls are Getting Old
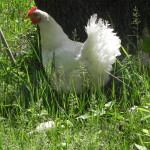
Going on their third lay cycle, the girls are getting old.
Our 13 hens were laying well but we knew they were on the downside of production. Young hens, called pullets, start laying when they are around 20 to 24 weeks old. During the approximately 14 months of their lay cycle we expect about 275 to 300 eggs per hen. Then they declare a vacation, take a break, shed their worn feathers, fatten up a bit, grow new feathers, increase their calcium, and after six or eight weeks begin their second lay cycle. They’ll produce fewer eggs this time and as they continue to age we can expect ever fewer eggs. So, about every third year we order baby chicks that grow into pullets to replace the old girls. The process takes time and requires planning.
Getting Ready for Baby Chicks
Around Christmas we began planning our new chick order. This year we cooperated with two friends. Each wanted some chicks but not a full order of 25. So, we placed a joint order with Hoover’s Hatchery in the tiny town of Rudd, Iowa. Leafing through their paper catalog and double checking their website helped us decide to order 50 chicks of diverse breeds. They’d collectively be a rainbow of feather colors and would lay light and dark brown, white, and blue/green eggs. We placed our order in January. Then, preparation really began.
Preparing for the Arrival
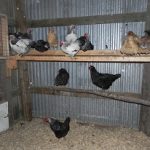
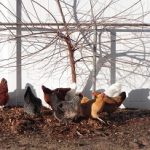
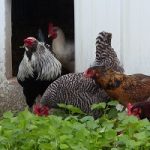
Keep adult chickens separate from chicks.
Our old chickens are in a coop Rich built in the corner of our small barn. We wanted to keep them until the new ones start laying in mid-summer. You don’t put baby chicks in with old ones. It just doesn’t work. Birds, like most creatures, are territorial and the old birds will kill the newcomers. The hens and chicks need to be kept apart. So, Rich made a second coop next to the existing one but separated by a wire and plywood wall. Inside the new coop, he made a large plywood box, complete with a plywood lid and two heat lamps to keep the babies warm until their feathers grew in and the weather warmed.
Hoover’s Hatchery sent a confirmation that the babies would arrive on March 15th. Gulp, the Ides of March. And, as it turned out, one of the colder days of winter.
Hoover’s also confirmed the breeds we ordered and the gender of each. We like having chicks arrive just as the winter is starting to wane and the weather is warming up. Normally our heat lamps keep the baby chicks warm in their brooder in the barn, but mother nature threw us a last-minute curve in 2017. A zero-degree low temperature was predicted. The lamps just couldn’t keep the birds warm enough in that chill, so just before arrival day Rich made two temporary brooders out of wooden boxes we had on hand. He set them up downstairs in the house in the same room as our wood stove. It’s the coziest room in the house. A couple of small lights in each wooden box was all that was needed to keep the chicks comfy in the heated room.
We hoped the arrangement would only last a few days until the weather warmed and the babies could move into the barn brooder. That many baby chicks start to smell after a few days. Everything was ready by the evening of March 13. The next two nights were frigid but the temporary brooders stayed warm.
-
-
Chicks stay warmer crowded in a box for the journey.
-

-
A temporary shelter until temperatures moderate.
-

-
Warm packs keep the chicks warm during shipping.
Each of the small brooders had a quarter inch of wood chips on the floor and a simple plastic drinking water dispenser that we had bought at a local store. An egg carton served as a temporary feeder sturdy enough to last only a couple of days until we switched to metal feeders.
Why Baby Chicks Can Be Shipped in the Mail
Baby chicks have an amazing adaptation that allows hatcheries to ship them all over the world. While they develop as embryos inside the egg they draw nutrition from the yolk. After 21 days in Hoover’s Hatchery incubators the chicks emerge wet and gangly. But, much of the yolk remains inside them and provides plenty of nutrition for their first few days of life.
As soon as their wet fluff dries Hoover’s staff remove the tiny babies from the incubators, sorts them by gender and breed, and puts them in shipping boxes that soon go to the post office. Every week hundreds of boxes and thousands of chicks get sent every which way. They safely reach destinations as far away as Florida and Alaska. If it’s cold out, Hoover’s slips warming pads inside the box with the chicks. Because they are still living off their yolk the babies don’t need to eat or drink during their journey which is often by airplane.
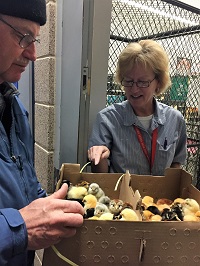
Our chicks arrived at the Cedar Rapids Post office when just a day old and by the time we got them to the house they were but 26 hours old! All 52 chicks arrived safe and sound, and loudly peeping. We opened the box at the post office to make sure they were all alive and because the postal service workers really wanted to take a peek at them. Then we hustled home. Rich gently picked each baby up, dipped its bill into the waterer in the brooder so they knew where to drink, and released it. Soon the shipping box was empty and the two brooders full of peeping babies. They were thirsty, hungry, and sleepy and began pecking at their food, drinking water, and tumbling over to the floor for frequent naps.
-
-
Chicks know how to forage, but have to be introduced to water.
-
-
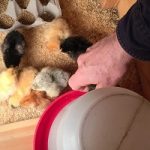
Only a day old, chicks learn to drink.
-
-
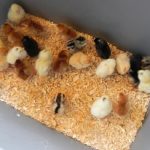
Day old chicks peck like pros at the nutritious feed.
Baby chicks are fun to watch. It’s a miracle of nature that an animal so young can feed itself and drink water without being tutored by a mother.
Baby Chick Nutrition
Adult chickens are omnivores that love seeds, worms, insects, fruit, and all sorts of other tidbits they find while scratching around outside. Baby chicks need a high protein diet and are too young to forage on their own, so we buy high protein feed called chick starter. It will be their main diet until they are old enough to forage in the run in a few months. Just before they start laying in about five months we’ll switch them to a layer feed that’s a little lower in protein but higher in calcium to meet the nutritional needs of a laying hen.
Making the Summer Switcheroo
As the chicks grow they’ll get too crowded in the brooder. By then spring will be in full glory and the weather warmer. Rich will take apart the brooder and let the adolescent birds roam around the full coop. They’ll grow fast and by early summer will need even more space. That will be time to say goodbye to the old hens and our one rooster. We put a notice on Craig’s list and have no problem selling the old birds for a buck apiece – a bargain for someone who wants older hens.
As soon as they are gone Rich will scoop the litter (a word that means the wood chips mixed with dry manure on the floor) and sprinkle it lightly on the garden. When used sparingly chicken manure is outstanding fertilizer that will stimulate the lettuce, chard, okra, tomatoes and squash that we harvest in summer. Then he’ll spray down the roosts, nests, feeders, walls and floor with a mild bleach/water solution and give it a day or two to dry. Next, are added a few inches of new clean wood chips to the floor and we welcome the youngsters to enjoy their new home.
This coop has a small door, called a pop hole, that leads outside to a huge fenced in run where the birds enjoy basking in the sun or sitting in the shade of a few small trees. They hunt for bugs and worms, exercise, and socialize outside or inside wherever they choose to be.
What Adult Chickens Need
Outfitting the coop for adult chickens is simple. Rich, being the consummate forager himself, made a feeder of scrap wood. Manufactured ones also work well. The birds always have a few buckets of drinking water and clean litter. A 2″X4″ with edges rounded off that spans the coop about four feet above the floor makes a comfortable roost, where the birds lounge during the day and sleep at night. It’s their bed. Can you imagine sleeping on your feet perched upright? Chickens do it every night. Many years ago, we salvaged a wooden nest that has eight nests, each about 12” by 12”. That’s where the chickens lay eggs. Our chickens always get fresh feed and water daily, and we harvest their eggs each afternoon.
Raccoons, opossums, skunks, mink, cats, and roving dogs all love to kill chickens, but mostly they prowl night. At dusk chickens always head inside and hop up to their roosts to sleep for the night. Rich or Marion closes and secure the latched pop hole door. Predators can’t reach the safely sleeping chickens. The chickens hop off the roost at dawn and greet the new day.
-

-
Sweet smile.
-
-
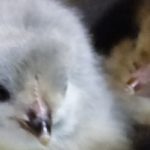
Newborn Orpington
-
-
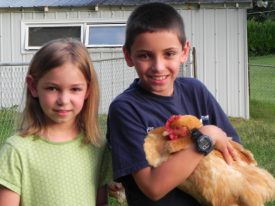
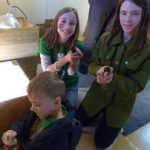
Children learn care of chicks.
At Winding Pathways, we love our chickens. They eagerly gobble kitchen scraps that otherwise would end up in the compost bin or trash and return us the world’s best eggs. We learn plenty from watching our chickens. Children grow up understanding where food comes from and how to care for animals. Over the years, we’ve learned they are remarkably intelligent with a well-defined social structure. They also have an extensive vocabulary. The different sounds they make mean different things. When given plenty of space, great care, and good food, chickens are clean, pleasant, and fun to be around. We wouldn’t want to live without their company and delicious eggs.
by Winding Pathways | Jan 5, 2017 | Chickens
Note: Winding Pathways is not paid by companies we feature nor do we receive any free material goods. We simply have had great results with their products in our yard.
Although most of the United States is still in the grip of winter, cold weather makes thinking about spring pleasant. It’s also a great time to prepare for summer yard and garden projects. Here are three catalogs or websites we enjoy reading when it’s cold out.
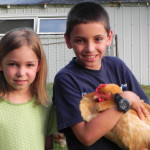
Children with
“Golden Hen.”
HOOVER’S HATCHERY: Located in tiny Rudd, Iowa, this hatchery has greatly expanded the number of chicken breeds it sells-even such rare ones as lavender Orpingtons. Now is the time to begin preparing for hosting baby chicks this spring. Check out Hoover’s Website. Many breeds are scarce and although it’s too early to receive baby chicks in mid-winter, by ordering soon, customers are more likely to receive their favored breeds. For information on backyard chickens type “chickens” in the Winding Pathways search and several blogs will appear.
SEED SAVERS EXCHANGE: Not far from Rudd is Seed Savers Exchange in Decorah, Iowa. They feature an amazing array of garden seeds. We buy many of our seeds from them and especially like trying their heritage varieties of tomatoes, beans, squash and many other vegetables featured in their catalog. Type “squash” in the Winding Pathways search and blogs on our love of winter squash will appear.
RAINWATER SOLUTIONS: Seeds need water to grow and it doesn’t always rain at the right time. A solution is to harvest rain that flows off the roof and store it in a rain barrel for later use. We have five rain barrels at Winding Pathways and use the water constantly. Now is a great time to order a barrel for use as soon as the temperatures consistently stay above freezing. Check out their website at. Type “rain barrels” in Winding Pathways search and a couple of blogs will appear.
The Linn county Master Gardeners column “From the Ground Up” featured an article on “Ordering Seeds From Catalogs” on January 1st. Living section 4L.
by Winding Pathways | Dec 30, 2016 | Chickens
Mid-winter is a perfect time to order baby chicks to arrive in the mail as the weather warms in spring. Homeowners can create an international flock of six hens that will be fun to keep and produce many delicious eggs.
Many hatcheries allow customers to order a mixture of breeds, but often they require buying 25 birds so the chicks stay warm during shipment. Winter is a perfect time to get together with other families who keep chickens to place a joint order to meet the minimum. Stores that stock chicks will usually sell as few as six, but their breed selection is normally limited.
Winding Pathways encourages folks to start browsing catalogs and on-line sites now and order soon to make sure desired breeds are in stock.
We’ve been keeping chickens of many breeds for decades at Winding Pathways. Both our children, now adults living in distant states, grew up tending our small flock. We love our fresh eggs and also appreciate the personalities and characteristics of our favorite breeds.
It’s easy to create an international flock. Here’s how we’d choose breeds for a six-bird flock that come from many places, are fun to be around, and lay plenty of eggs.
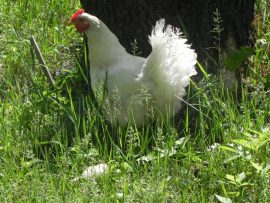
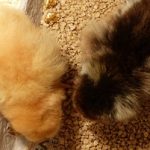
One Buff Orpingtons. This is a golden hen developed in England. Large, fluffy, and gentle. Orpingtons are so-so layers but absolutely beautiful, fun to be around, and easy to care for. A young chick enthusiast named ours “The Golden Hens”.
One Rhode Island Red or New Hampshire Red. We like having a “Yankee” chicken in our flock. Rhode Islands are dark reddish in color and are outstanding layers. New Hampshires are a lighter red and good layers, although perhaps not quite as good as Rhode Islands.
One Barred Rock. Sometimes called Plymouth Rock, there are several colors of the rock breed and all are good. Not quite as friendly as the Orpingtons but a better layer. This is another “Yankee” breed either named for Plymouth Rock in Massachusetts or developed by a breeder in Plymouth, NH, depending on the source of information.
One Americana. People love the blueish/greenish eggs this breed lays. They are good layers that originated in South America.
One Maran. This French breed lays very dark brown eggs. Marans come in various feather colors that children love to gather. We sometimes collect feathers and give them to our fly-fishing son-in-law who ties his own flies.
One beautiful and unusual bird. Look at the photos in printed hatchery catalogs and on websites and choose an interesting and colorful brown egg layer. Often these ornamental breeds aren’t great egg layers, but they are interesting and colorful. Some possibilities include Wyandottes, good layers developed in New York; Brahmas, perhaps from India; Cochin, not so good layers but named for Cochin China – near the mouth of the Mekong River in Vietnam; Sussex, a good layer from England; Jersey Giants from New Jersey; or Buckeyes from Ohio.
In recent years we’ve purchased our chicks from Hoovers Hatchery but we’ve also bought them from McMurray Hatchery. The following three hatcheries have interesting websites and provide outstanding chicks of many breeds: Cackle Hatchery; Murray McMurray Hatchery; Hoovers Hatchery.
-
-
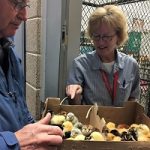
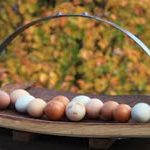
A variety of chickens lay beautiful and nutritious eggs.
-
-
Newly arrived chicks.
-
-
Chickens grind up garden residue.
-
-
Enjoying greenery.
by Winding Pathways | Oct 30, 2016 | (Sub)Urban Homesteading, Chickens, Energy Efficiency
One late October afternoon Rich brought only three eggs into the kitchen. In spring and summer our 15 hens normally give us a dozen beautiful eggs every day. Like so many signs in nature our chickens are telling us it is transition time.
We have lucky chickens. They enjoy good food, safe living space, and daily fresh air, sunshine, exercise and natural food. Seasons shape their lives, but even their unfortunate counterparts living in cramped cages in factory farms are not completely immune to seasonal changes of nature.
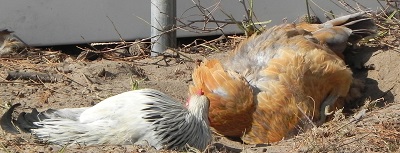
When molting chickens lounge, take dust baths, and re-grow new feathers.
A hen starts laying when she’s four to five months old and stays laving for 12 to 14 months. Egg laying is tough on bodies and after a year chickens need a vacation. So hens call time out. They shed old worn out feathers and grow new ones, rest and eat as they build back strength. After a month or two they look great in their new feathers and begin laying again – if they are fortunate enough to live in a backyard flock.
Commercial egg operations kill hens as they begin to molt and replace them with young birds. Not us. We keep our birds for at least two years. In their second lay cycle our hens give us slightly fewer eggs but they are huge with bright yellow/orange yolks in shells of various hues.
Molting is caused, in part, by the age of the bird, but declining daylight is a major factor. Nature has programmed chickens to lay the most eggs in spring. As fall’s days shorten production drops. We let our chickens enjoy seasonality. Commercial eggeries don’t. Their unfortunate hens live in windowless buildings with lighting that simulates spring to stimulate peak production.
Declining day length triggers thousands of reactions in our world outside the living room windows. Here are just a few things we notice:
-

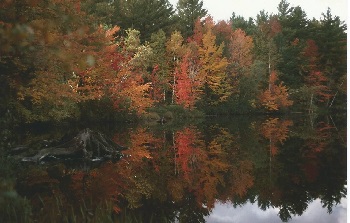
A still day of reflection on Turtle Stump.
Leaves of our sugar maples turn vibrant red/orange before drifting to the ground like snow. Our black, white, and red oak leaves wait a bit later until turning rust colored and shedding, although some oaks keep dead leaves all winter.
- White footed mice, box elder bugs, and Asian beetles try their best to get into the house before cold weather settles in.
- There are comings and goings in the yard. We’ve said “goodbye” to house wrens, orioles, grosbeaks, warblers and many other birds but are delighted to welcome back juncos from their nesting grounds up north. Hawks, geese, and even pelicans pass overhead on their way south.
- The world sounds and looks different as humid summer air transitions into fall’s dryness. Colors are more vibrant in low humidity air, sound transmits more clearly, and late afternoon sunlight dances across tree trunks and drying prairie grasses.
-
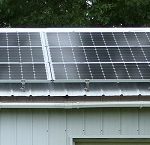
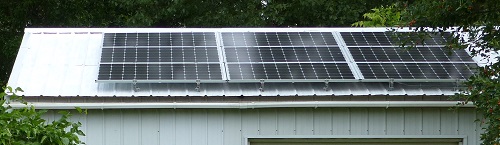
Sunlight hits our solar panels at a different angle in the fall and winter.
We produce a bit less electricity from our photovoltaics because the sun isn’t shining as long each day, but peak production is earlier in the day than in midsummer
- Sitting outside on a bright autumn day lets us soak in the sun’s delicious warmth but it cools quickly as the sun drops. Then, we go inside to enjoy the warmth our wood stove provides.
- Clouds drift by and sunrises and sunsets are particularly colorful.
- Autumn and winter constellations enchant viewers and linger into the darker mornings. Because the temperatures are mild, star gazing is pleasant.
Fall is a beauty filled season. We encourage you to “Go outside and play!”
by Winding Pathways | Oct 10, 2016 | (Sub)Urban Homesteading, Chickens, Garden/Yard

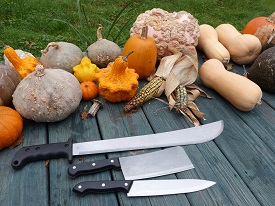
Winter Squash vary in color, texture, shape and size.
One of the most exciting times of our gardening year is winter squash harvest. Few plants are as interesting or useful. They’re diverse, easy to grow, colorful, easy to store, delicious, and can be used in dozens of recipes.
Winter squash were domesticated by Native Americans long before Columbus and with beans and corn provided a balanced diet. Although there are several species of squash all share similar characteristics. It’s hard to believe that common jack-o-lantern pumpkins are the same species as delicate acorn squash – but they are. Squash range in size from tiny acorns to massive 2,000 pound pumpkins. They also vary greatly in shape and color.
Squash are categorized as either summer or winter. Summer squash, such as zucchini or crookneck, are eaten during summer when the fruits are small and tender. They don’t keep long. Winter squash, in contrast, are allowed to mature until they are full grown and hard. They keep for months.
Here’s why we like winter squash at Winding Pathways:
- They’re easy to grow. Plant seeds in rich soil after the danger of frost has past, keep the weeds down until the squash plants are about a foot tall, and then just let them grow. They will out compete weeds as their vines create a solid mass of leaves.
- They’re easy to harvest. We wait until the vines die back in September and then clip off the stems with a pruning shear. We load them up in the wheelbarrow and spread them on the back deck where they continue to cure in the sunshine.
- They’re easy to store. No canning, freezing, or drying is needed. We simply bring the squash inside before the first frost and store them in a dry cool location. Several types last for months and we’re still eating them in March.
- They’re a delicious, versatile, and nutritious food. Squash is loaded with vitamins, omega 3 fatty acid, and minerals.
- They’re just plain fun. Squash even make interesting table decorations.
Winding Pathways Squash Growing Tip
Every year we plant many varieties of winter squash and pie pumpkins. We can never predict which types will grow best in a given year. In some years we get a heavy crop of one type while others barely produce a fruit. Diversity assures a good crop. Many garden stores only sell a few varieties, but we hedge our bets and order seeds of many varieties. Our favorites are Butternut, Hubbard, Silver Bell, and Sweet Potato. A wonderful source is Seed Savers Exchange. Some varieties grow to massive size, but with only two of us at Winding Pathways we stick with varieties that produce smaller squash fruits. Fortunately, plant breeders have created a downsized version of the traditional Hubbard squash and several other types.
Cooking Winter Squash
Every cookbook has winter squash recipes and Epicurious offers more online. We usually keep it simple and use our squash as a side dish with melted butter. Here are some squash cooking tips:
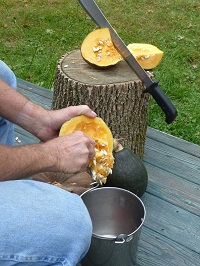
Opening a tough skinned squash: The tough thick skin covering a winter squash keeps it fresh for months but can be intimidating to cut. A heavy bladed sharp knife works but we have fun and put the squash on a chopping block outside and whack it with a machete! Works great. Our cousin, Marie Zieger, avoids cutting through tough skin by simply baking the whole squash. That softens it and makes it easy to slice it open. Another way of opening a big squash is to simply drop it on concrete to crack it and then pry it apart.
Cooking the squash: We place chunks in a pan and baking at about 350 degrees for about an hour or until the flesh is soft. Using a microwave is faster and works fine. Sometimes we put chunks in a pressure cooker for about 15 minutes. The pressure cooker method results in moister cooked squash flesh. Occasionally we’ll cut the raw squash into chunks and add them to winter stews. Extra cooked squash can be put in sealed containers and frozen.

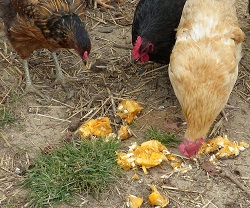
We recycle the seeds to the chickens.
Seeds and the tough skin: We scoop out the seeds and feed them to our chickens. Some people remove the cords that hold the seeds together, wash the seeds lightly, apply a seasoning, and roast them for a delicious high protein snack. Tough skins go into the compost bin.
We love winter squash. Few plants are as easy to grow and delicious.
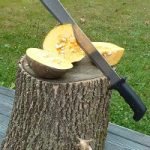
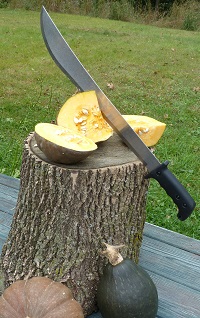
A machete is useful in cutting squash.

Chickens efficiently recycle squash seeds to eggs.
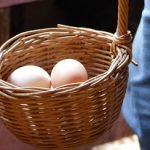
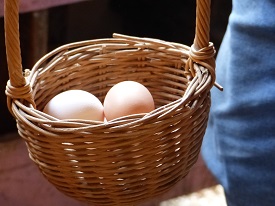
Eggs in basket