by Winding Pathways | Sep 10, 2016 | (Sub)Urban Homesteading, Chickens

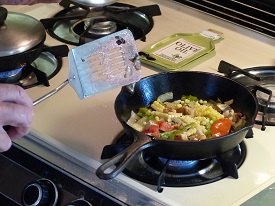
Checking the fresh vegetables as they cook in the cast iron pan.
Want to buy a product that’s inexpensive, American made, can be used every day of your life and then passed on to your children as a legacy? Cast iron cookware fills the bill.
One cool August morning Rich collected eggs from our backyard chicken flock, pulled out a cast iron skillet, and minutes later we enjoyed a delicious omelet. “That skillet once belonged to my great grandmother. It’s been handed down through generations and must be a century old yet still works great,” he said.
In this day and age when nearly all products quickly become obsolete or break, cast iron is amazingly durable. This type of cookware has been manufactured for well over 100 years and new and old ones cook amazingly well.
“I can’t think of any product as enduring as cast iron cookware. They truly last a lifetime or longer,” said Mark Kelly of Lodge Manufacturing. The company makes dozens of types of cast iron cookware in its Tennessee facility. Other American companies make small quantities of artisan cast iron skillets but they are pricey, while low quality ones are imported from China.

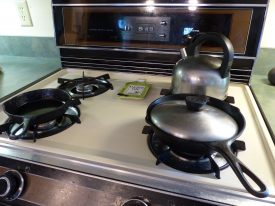
pans on the stove
We love our cast iron and regularly use several skillets of different sizes and a Dutch oven to slow cook winter stew. Several are of unknown age but obviously old. Few have any writing embedded in them so their age and who made them is unknown. We augmented our heritage pans with a few new ones made by Lodge Manufacturing. Here’s what we like about our old and new cast iron cookware:
- Lasts nearly forever.
- Easy and fun to use. Clean up is a snap.
- Heavy cast iron produces an even heat and adds a tiny bit of nutritional iron to food.
- Made in the US! Partially of recycled metal. In the unlikely event that one cracks we can recycle it.
- Food coming out of cast iron is delicious.
- Amazingly inexpensive to buy. A small skillet costs under $20.
Rich’s Sunday Morning Pancakes or Winding Pathways Waffles
2 cups whole wheat flour
½ cup buckwheat flour
½ cup milled flax or oat bran
½ cup sunflower seeds or minced pecans
¼ cup of raisins or small pieces of apple.
Two tablespoons of powdered milk
One tablespoon of baking powder
One fresh egg
Vegetable oil. (optional but needed for waffles)
Combine and mix dry ingredients and add water while stirring. Pour pancake sized pool of batter on a heated cast iron skillet. Cook on medium heat until bubbles in mix break. Flip and cook the other side. Enjoy with butter or a dollop of yogurt and warm maple syrup.
Cast iron cookware is often sold in hardware and outdoor stores and online. For information contact Lodge Manufacturing.
Our friends, Jim and Diane Low, of Missouri are accomplished chefs who specialize in cast iron cooking over wood coals. Jim wrote, “The morels and wild turkey with bow-tie pasta and nut-crusted venison loin best fit the hunting/foraging description.” He shared several of his favorite recipes:
Wild Rabbit & Bowtie Pasta in Chardonelle Cream Sauce
Here’s the recipe, as best I can reconstruct it. It was a work in progress the first time, and I honestly don’t remember exactly what I did. Furthermore, the following includes things I will do differently next time – such as adding the mushrooms. Take this as a starting point for your own creativity.
INGREDIENTS
Back straps from 2 large or 3 small rabbits, cut in 1” cubes. Substitute chicken breast if necessary.
olive oil
12 oz. of Bill Powell’s Chardonelle
12 oz. of chicken stock
4 medium shallots, finely chopped
4 bay leaves
2 teaspoons of cracked peppercorns
12 sprigs of fresh thyme, chopped
8 oz. half and half or heavy cream
1 large green bell pepper and 1 large red bell pepper sliced into thin strips about 2 inches long
8 oz of fresh mushrooms, sliced ¼ inch thick
1 stick of cold butter, diced
Fresh lemon juice
Salt to taste
PREPARATION
Sear the meat. Put it in a bowl and keep warm in the oven.
Add a little olive oil to the skillet and sauté the shallots on low heat until they begin to soften. Add the stock and increase the heat to medium. Use a spatula or wooden spoon to scrape up the browned meat juices from the bottom of the skillet and dissolve them in the stock. Add the seasonings and continue simmering until the liquid is reduced by 2/3. Add the cream and reduce the resulting mixture by half.
Remove the sauce from heat and strain into another container, then return the sauce to the skillet and whisk in the butter. Season to taste with salt, lemon juice and additional pepper, if needed. Stir in the browned rabbit chunks and keep warm.
Cook pasta. I recommend bowtie, ‘cause it’s cute. While it is cooking, sauté the bell pepper strips and mushrooms in butter until soft on the outside, but still firm. Place pasta in a large serving bowl and arrange the bell pepper strips on top. Pour sauce and rabbit meat over the top. I don’t know how much pasta you should cook. I cooked too much, then discarded what I thought was too much for the sauce.
CHICKEN & DUMPLINGS
1 pound of chicken breast, cut into 1-inch chunks
2 Tablespoons margarine or butter
1 cup diced potatoes
12 ounces of mixed vegetables (thawed)
2 Tablespoons crumbled bacon
small can mushrooms, drained
2 teaspoons parsley flakes
1 can cream of chicken soup
4 ounces evaporated milk
½ teaspoon paprika
½ teaspoon sage
2 cups Bisquick
4 ounces evaporated milk
½ cup water
2 Tablespoons water
1 egg, beaten
Melt 2 Tablespoons of butter in a 12-inch DO on low heat (7 briquettes under oven). Sauté chicken until cooked through. Add potatoes and cook another 3 minutes. Add veggies, bacon, mushrooms,, parsley soup, 4 ounces of milk and spices. Cook on medium heat (12 briquettes under oven) with lid on. While heating, cut remaining butter into Bisquick in a mixing bowl. Stir in milk, water and eggs in a mixing bowl. When chicken mixture bubbles, drop tablespoon-sized dollops of Bisquick mixture on top of broth. Bake 25 minutes at 350 degrees (8 briquettes under oven, 16 on top)
ZUCCHINI BAKE
3 cups grated zucchini
1 ¼ cups uncooked oatmeal
1 cup grated mozzarella
1 Tablespoon dried, minced onion
1-3 teaspoons dried, minced garlic
1 egg, beaten
1 teaspoon dried basil
½ teaspoon salt
¼ teaspoon black pepper
½ cup tomato sauce
Mix all ingredients except tomato sauce in order listed. Pour into a 10-inch Dutch oven and top with tomato sauce. Bake 30 minutes at 350 degrees.
PULL-APART BACON BREAD
2 3-ounce cans of cooked bacon pieces or 24 ounces of bacon, fried and crumbled
1 Tablespoon of cooking oil or bacon grease
½ cup chopped green pepper
½ cup chopped red pepper
1 cup chopped onion
4 tubes of buttermilk bisquits (30 ounces)
¾ stick melted butter or margarine
2 cups (8 oz) grated cheddar cheese
Preheat a 12-inch Dutch oven to 350 degrees. Place a small tin can in the center. Saute vegetables in oil. Cut biscuits into quarters and place in a large mixing bowl. Add sautéed vegetables, bacon, butter and cheese. Toss until well mixed and arrange around the tin can. Bake at 350 degrees for 30 to 40 minutes. Invert into a serving pan as soon as cooked and serve immediately.
BASIL, BELL PEPPER AND JACK CHEESE CORNBREAD
1 cup chopped onion ½ cup chopped fresh basil
1 ¾ cups cornmeal 3 eggs
1 ¼ cups flour ¼ cup sugar
2 ounces diced red bell pepper 1 Tablespoon baking powder
1 ½ cups grated pepper jack cheese ½ teaspoon baking soda
1 1/3 cups canned or frozen corn, drained 1 ½ teaspoon salt
½ cup unsalted butter, chilled and cubed 1 1/2 cups buttermilk
Melt 1 tablespoon of butter and sauté onions until tender. Set aside to cool. Mix cornmeal, flour, baking powder, baking soda, salt and sugar in a large bowl. Add 7 Tablespoons of butter and rub into the flour/meal mixture with your fingers until it resembles coarse meal. Whisk milk and eggs together in a small bowl. Add milk mixture to dry ingredients and stir until blended. Fold in cheese, corn, peppers, basil and onion. Transfer to Dutch oven and bake 45 minutes at 400 degrees.
ROAST CHICKEN AND CARROTS
3-4 lb. roasting chicken 2 bay leaves
2 Tablespoons unsalted butter 2 springs of fresh thyme
2 tablespoons olive oil 1 cup chicken stock or bullion
2 cups diced yellow onions ½ cup dry white wine
6 garlic cloves, peeled and minced 3 cups stewed tomatoes (28-ounce can)
3 ½ cups diced celery Kosher salt and freshly ground black pepper to taste
4 cups carrots, peeled and sliced 2 Tablespoons fresh parsley
Put butter, oil, onions, garlic and celery in oven and saute over medium heat until softened. Add the carrots, bay leaves and thyme and cook another 5 minutes. Add chicken, stock, wine and tomatoes and season with salt and pepper.
Cover the oven and cook at 300 degrees for 1 ½ hours or until legs are loose and meat is falling off the bone. Replenish coals every 30 minutes and turn oven and lid every 15 minutes. Remove bay leaves and thyme spring before serving.
To make dumplings, add 2 cups of chicken stock when chicken is cooked and bring to a slow boil. Add dumpling dough per instructions on Bisquick box.
LEMON PEPPER CHICKEN SUPREME
4 chicken breasts
12 ounces of Lawrey’s Lemon Pepper Marinade
16 fresh asparagus spears
1 cup crab meat
4 medium mushrooms, sliced
1 small onion, sliced
6 tablespoons grated parmesan or romano cheese
4 slices of bacon
1 Tablespoon sesame seeds
2 sandwich-sized slices of swiss cheese
1 medium avocado
1 Roma tomato
2 tablespoons sliced almonds
lemon pepper seasoning
Butterfly each chicken breast, leaving halves attached. Marinate in half the marinade for at least 30 minutes. Remove breasts and lay them flat. Discard used marinade. Sprinkle each breast with lemon pepper . Place four asparagus spears on half of each breast. Evenly distribute mushroom, onion slices and romano cheese on top of asparagus. Fold other half of breasts over to form a sandwich. Wrap each breast in a bacon slice and secure with a toothpick. Put the breasts in a 12-inch Dutch oven and pour half the remaining unused marinade over the chicken. Sprinkle sesame seeds and almond slices over breasts. Cook at 350 degrees for 45 minutes. While chicken is cooking, cut cheese slices diagonally to form triangles. Peel avocado and cut into slices ¼ inch thick. Slice tomato into thin round slices. When chicken is done, place on serving platter and arrange cheese triangles in alternating layers to produce a chevron pattern. Garnish with avocado and tomato slices and drizzle some of the remaining marinade over the chicken.
ASIAGO BRIOCHE (Relax, it’s just butter bread.)
1 package dry yeast (2 ½ teaspoons
¼ cup warm water
½ cup milk
½ cup butter (1 stick) at room temperature
2 Tablespoons sugar
½ teaspoon salt
3 eggs
1 egg yolk
3 ¼ cups all-purpose flour
1 cup grated or crumbled asiago cheese (Rromano or parmesan cheese are okay, too)
Egg glaze – one egg white beaten with 2 tablespoons milk
Sprinkle yeast into warm water and stir until dissolved. Heat milk until very warm. Beat butter until creamy. Add sugar, salt, whole eggs and egg yolk. Beat well. Add milk and yeast mixture. Add flour and cheese a little at a time and beating sell after each between additions. Turn dough out onto a lightly floured board. Knead until smooth and satiny. Place in a greased bowl and butter top lightly. Cover with a clean dish towel and set to rise in a warm place until double in size. Turn out on a lightly floured board. Roll into a 12-inch log and cut into thirds. Roll each third into an rope 1 ½ inches thick.. Lay ropes side-by-side on a lightly floured board, Pinch together at one end and braid tightly. Using a large metal spatula, lift the braid and curve it around the inside of a well-oiled 12-inch (regular, not deep) Dutch oven. Spread egg white glaze over top with a pastry brush. Cover and return to warm place to rise until double in size. Bake at 375 degrees 30-35 minutes, until the loaf sounds hollow when thumped. Serve warm.
PAPRIKA VENISON (OR BEEF) STEW
Ingredients
2 ½ – 3 cups of stew meat, cut into half-inch cubes
½ cup flour
3 Tablespoons of paprika
Salt & pepper to taste
3Tablespoons of butter
2 medium onions, diced
2 cloves of garlic, minced or crushed
1 teaspoon of marjoram
11 ounces canned diced tomatoes
½ cup cup (4 oz.) sour cream
½ cup red wine
Equipmment
Gallon-size resealable plastic bag
10-inch Dutch oven (for single recipe)
10-inch deep Dutch oven for cooking noodles
Medium large bowl to hold cooked meat
Place flour, salt and pepper in plastic bag. Add cubed meat and shake to coat meat completely. Melt 1 Tablespoon of butter in a 400-degree oven. (7 for a 350-degree oven, plus 4 for an additional 50 degrees, or a total of 13 for a 12-inch) Add half the meat and fry until golden brown. Repeat with the rest of the butter and meat.
Melt remaining Tablespoon of butter and sauté garlic and onions until transparent. Add meat, paprika, tomatoes, marjoram and wine. Simmer over low heat 45-90 minutes. Cook egg noodles so they are done when stew is finished. Just before serving, add sour cream and stir into sauce.
DIANE & JIM’S VENISON STEW
Stew
¼ cup shortening
¼ cup all-purpose flour
1 ½ teaspoon salt
10 ounce can beef broth
5 cups water
3 Tablespoons fresh lemon juice
1 medium onion, sliced
6 large carrots, quartered
4 stalks celery, quartered
8 ounces fresh mushrooms, sliced thick
2 cans green peas, drained
2 cloves garlic, crushed or minced
2 whole cloves
1 bay leaf
3 pounds venison, cut into 1- to 1 1/2 –inch cubes.
½ cup dry red wine
2 tablespoons flour
Dumplings
4 slices white bread
2 pounds potatoes coarsely grated
1 teaspoon salt
1 Tablespoon of onion, grated
1 Tablespoon of dry parsley flakes
2 eggs, well beaten
all-purpose flour
Melt shortening in a 12-inch deep or 14-inch Dutch oven over low heat (5 briquettes). Add flour and cook until caramel covered, stirring constantly. Add salt and next 11 ingredients. Boil 5 minutes (20-30 briquettes under oven, lid on. Add venison, cover and reduce heat until the broth barely simmers (5-8 briquettes under oven). Cover and cook 2 hours.
Remove crust from bread and discard. Drain all water from potatoes. Tear bread into 1-inch pieces. Combine bread, potatoes, salt, onion, parsley and eggs. Roll mixture into 16 balls and roll lightly in flour. In a small bowl, mix wine and flour until no lumps remain.
Stir wine & flour mixture into broth. Place dumplings on top of broth and simmer until dumplings are cooked through, 10-20 minutes (7-10 briquettes under oven, 10-20 on top.)
BREAD PUDDING
4 eggs
8 slices white bread
2 cups canned apples or applesauce
2 cups milk
1 to 2 sticks butter or margarine
2 cups brown sugar
2 cups raisins, softened in hot water
cinnamon
Beat eggs and milk together and set aside. If using apples, mash with a fork to chunky consistency. Drain raisins.
Line a 10-inch Dutch oven with heavy-duty aluminum foil, shiny side toward food. Make sure the foil stops just below the top of oven wall, allowing lid to seal properly.
Butter four slices of bread on one side, cut each diagonally and lay in a single layer to cover bottom of oven, butter side down. Spread half the apples over the bread layer. Sprinkle generously with cinnamon. Sprinkle half the sugar and all the raisins over the apples. Butter, cut and layer remaining bread, butter side down. Spread the rest of the apples and sugar over the top and sprinkle generously with cinnamon. Pour egg and milk mixture slowly over all, taking care not to let it run between foil and oven wall. Cover and refrigerate for 30 minutes to allow liquid to soak in.
Bake at 350 degrees (7 briquettes under, 13 on top) for 45 minutes. Remove lid and allow to cool before serving. Great plain, with ice cream or whipped cream.
NUT-CRUSTED VENISON OR BEEF LOIN
Grind 1 cup of pecans in a blender, food processor or meat
grinder. Mix the nuts with 1/2 cup of Italian flavored bread crumbs,
2 tablespoons of chopped fresh or dried parsley, 2 teaspoons of pepper and 2 teaspoons of salt. Add enough cooking oil to give the mixture a pasty consistency.
Put a 2-pound roast in a greased Dutch oven. Coat the roast with
the nut mixture. Cover and cook 30 to 45 minutes with about half of the oven lid covered with coals and a little less heat on the bottom. Serve when the meat is still pink in the middle.
Charcoal briquettes provide even, longest-lasting heat. If cooking in an oven, bake the roast at 350 degrees in an uncovered baking pan.
PINEAPPLE UPSIDE DOWN CAKE
¼ cup butter
½ cup brown sugar
¾ cup walnuts or pecans
1 can sliced pineapple
1 regular yellow cake mix
Eggs, water and other ingredients called for on cake mix box
Melt butter in a 12-inch Dutch oven. Remove from heat and mix in sugar. Arrange pineapple rings on top of butter-sugar mixture and place a cherry in the center of each. Sprinkle nuts on top of pineapple rings. In a separate bowl, prepare cake mix per package directions and pour into the Dutch oven. Bake at 350 degrees for 30-40 minutes. Remove from coals, uncover and let cool 10 minutes. Place a cutting board, foil-covered cardboard or a large plate over the top of the oven and flip. Oooh, ahh, and eat.
BAKED APPLES
12 small, tart apples
½ cup brown sugar
½ cup pecans or walnuts
½ cup raisins
¾ tsp nutmeg
1 tsp cinnamon
1 stick of butter
¼ cup water
Core the apples, leaving the bottom intact if possible. Arrange the apples in a 12-inch Dutch oven. Pour water into bottom of oven. Combine the other ingredients, and spoon the mixture into the hollow apples. Dot with butter and bake at 350 degrees for 30 minutes. Open oven and baste apples with pot liquor. Bake another 10 minutes or so, just enough to soften apples through. Best with vanilla ice cream.
by Winding Pathways | Feb 5, 2016 | Chickens
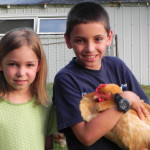
Children with
“Golden Hen.”
I’m not sure where it came from but somehow I became fascinated with chickens. I was eight years old living in suburban New Jersey, didn’t know anyone who had chickens, and no one in my family had ever had them. The interest came on strong 58 years ago and I’m still at it.
Dad and Mom were supportive and, I think, saw chickens as a way to learn. “Let’s build a coop and get a few,” Dad said, and soon he and I were building a chicken house just big enough to hold four hens. It was an education in basic carpentry. I bought four hens from Mr. Lawrence, the local egg man in an era when eggs, milk, and bread were delivered to the door.
The hens were my pride and joy. What I brought into the kitchen weren’t just eggs. They were brown jewels. Sometimes I’d just watch the hens after school and learned they are intelligent, communicate with each other through various calls, and are clean and odorless. They taught me that if I cared for animals humanely I’d receive an education, entertainment, and delicious food.
Chickens are part of our lives at Winding Pathways, and they continue to amaze Marion and me with their intelligence, comical antics, curiosity, and amazing ability to convert weeds, kitchen scraps, and insects into the jewels we bring into our kitchen.
CHICKENS BELONG IN MANY YARDS
A backyard chicken phenomenon is booming in America. Many towns have scrapped ordinances that once prohibited homeowners from keeping a few birds, and today thousands of families are experiencing the joy of poultry care. In the many backyard chicken workshops I’ve taught people say they want to have chickens for these reasons:
- “We don’t like the inhumane way commercial chickens are kept.”
- “Our kids will learn where food really comes from.”
- “The kids will learn responsibility by caring for animals.”
- “We’ll enjoy safe healthy eggs produced right in our yard by hens that consider weeds, kitchen scraps, and the treats and feed we provide gourmet fare.”
CHICKENS IN HISTORY
Chickens were domesticated thousands of years ago from wild jungle fowl that live in steamy Southeast Asia. Early humans valued them for the same reason we do today for their ability to convert things people can’t eat into delicious meat and eggs. Wherever people went they brought chickens along, even on long ocean voyages in sailing ships.
A chicken craze spread rapidly in Europe and the United States in the 1840s and 1850s when people nearly everywhere kept birds, took them to shows, and developed hundreds of standard breeds. Today there are thousands of different kinds of chickens. Among their many traits, they are amazingly diverse in size, feather and egg color, and temperament.
IS IT LEGAL?
A century ago families in huge cities, small towns and out in the country all kept chickens legally, but following the growth of suburbia many towns passed ordinances prohibiting the keeping of livestock. That usually included chickens. Ironically New York City never banned keeping chickens yet small towns in farm country did! In the past decade many towns have changed their ordinances to allow homeowners to keep small flocks. The best way to find out if your town allows chickens is to either call the city clerk or access ordinances on the municipal website.
ABOUT BREEDS AND BUYING CHICKENS
Marion and I have kept a few dozen different breeds over the past 40 years, and here are our favorites:
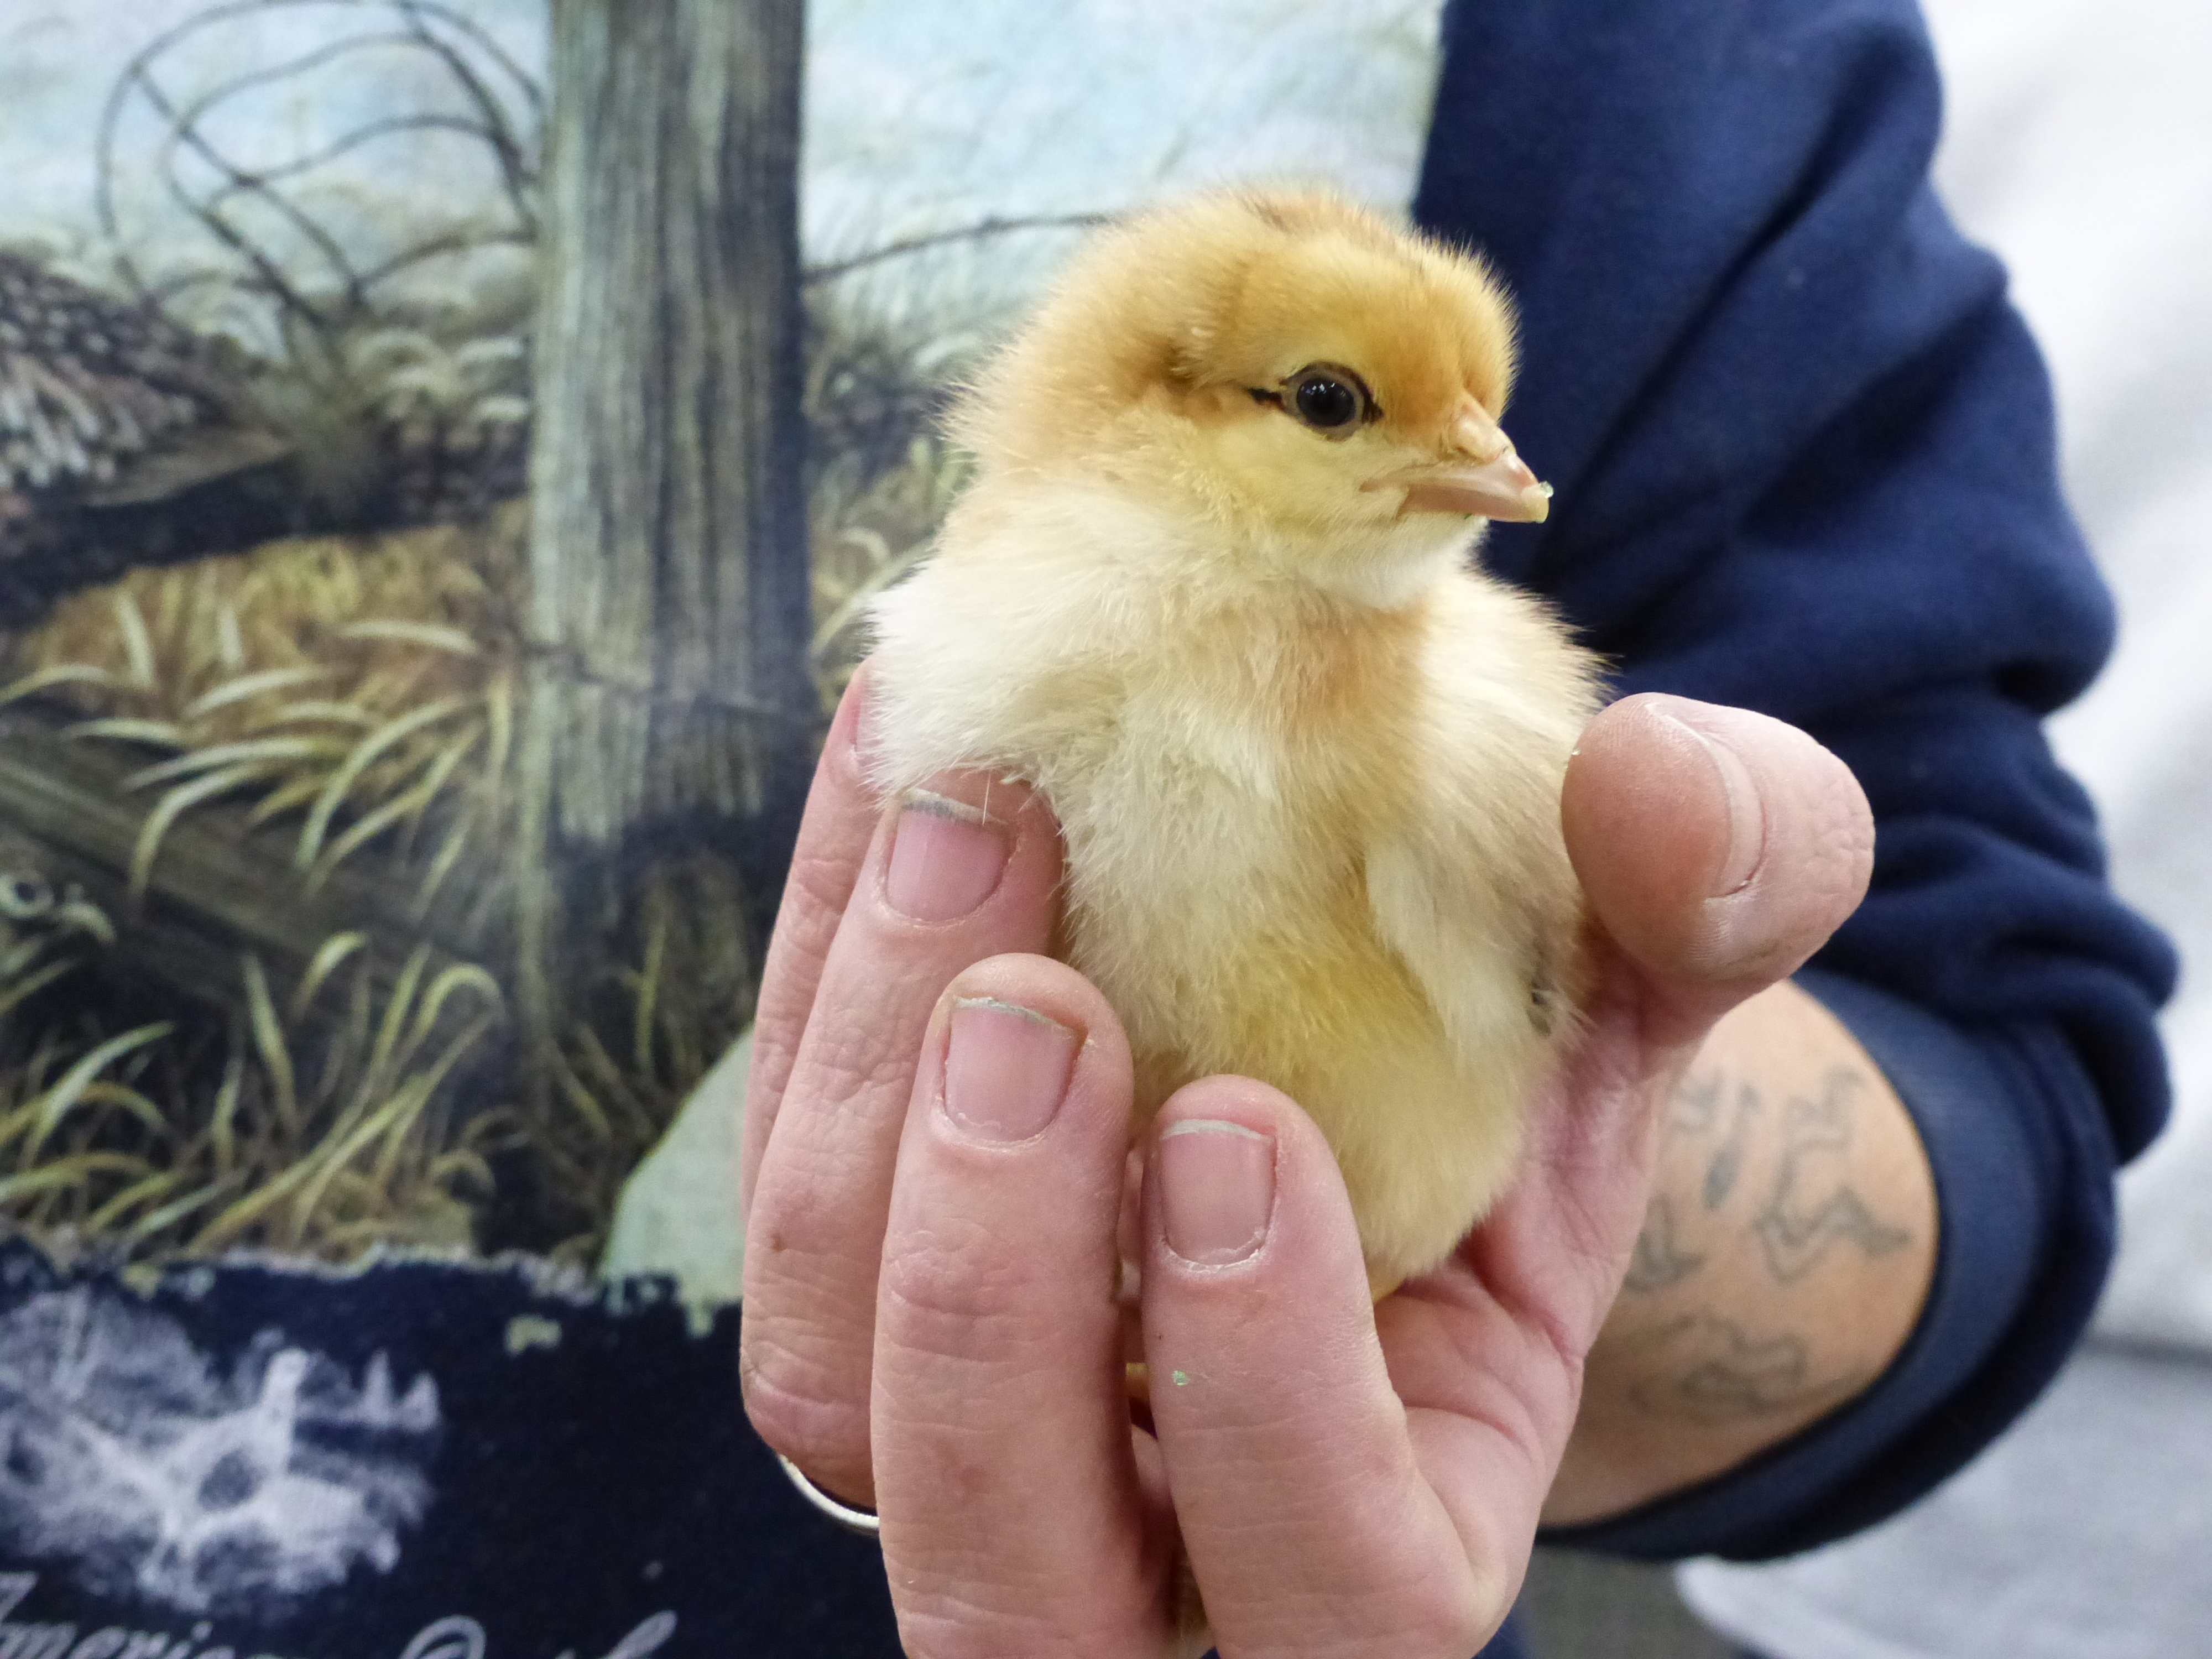
- Buff Orpingtons are gorgeous. We call them “golden hens” because of their color. They are quiet, tame and the friendliest breed. Although not the best of layers they aren’t slackers either. Each hen lays three or four brown eggs a week.
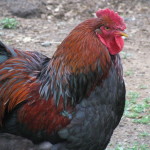
- Rhode Island Reds are one of the best brown egg layers. Marion’s from New England so how can we resist a breed from her native region? They aren’t as friendly as Orpingtons but lay more eggs.
- Australorps are glossy black. These Australian-developed chickens are quiet, tame and good brown egg layers.
- Light Brahmas are fluffy white with feathered legs and black heads and tails. They, too, are quiet, tame and one of the biggest of chicken breeds. They can weigh over ten pounds!
- Americaunas lay blue or green eggs. Known as “The Easter Egg Chicken” for the color of the eggs, they are good layers but production drops off in the winter.
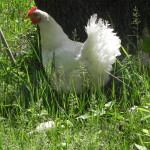
- California Whites lay white eggs like fury. We generally avoid flighty and somewhat noisy white egg layers, but California Whites are reasonably quiet and lay an egg almost every day.
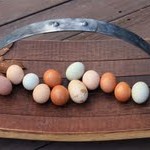
We enjoy these breeds for the above reasons and an array of brown, white, and blue/green eggs looks great in the cartons of eggs we give our friends.
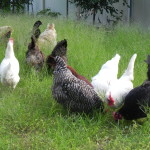
We order a mix of compatible breeds.
Our golden Hen is friendly and quiet.
One of the best brown-egg layers.
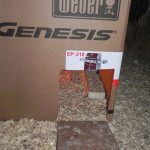
We buy baby chicks each spring from Hoover’s Hatchery about a month before our last frost date. Mother Nature must have designed baby chicks for the postal service. After hatching there’s enough yolk remaining inside to nourish them for a couple of days -just long enough to make the trip from the Rudd, Iowa, hatchery to our home. Our brooder is a big cardboard box with two light fixtures hanging about a foot above the floor to keep the babies warm. Wood shavings cover the floor. We use an inexpensive waterer and feeder and a nifty and very safe light fixture we bought from Premier1. A 40 pound bag of chick starter rounds out early chick needs. We like the Nature Wise brand. The chicks live in the brooder for about a month. By then the weather’s warming and they’ve grown enough feathers to remain comfortable on cool spring nights. We set up the brooder in the middle of the coop and when chicks no longer need heat it we simply remove the cardboard box and they are in their permanent home.
We usually buy 25 chicks sold as “straight run”. This means about half will be baby hens, or pullets, and half will be baby roosters, or cockerels. We keep the hens for egg production and butcher the males when they are 12 to 15 weeks old. Because many people don’t want to deal with roosters, they purchase pullet chicks. Specialists at the hatchery are able to separate the genders. Many backyard chicken keepers like to buy a mix of breeds, and many hatcheries are happy to send a blend.
DETERMINING THE BEST BREED FOR MY FAMILY
With hundreds of breeds available it is hard to decide which is best. Fortunately there are excellent resources. One of the best web sites is My Pet Chicken. Click on breeds to find a chart with many breeds listed, approximately how many eggs each lays weekly, egg color, and more. Other websites have similar information. Hatchery catalogs are also a great way to learn. Check Hoover’s Hatchery or McMurray Hatchery. Each company will send a catalog, but information is on their websites. Finally, many books help newcomers learn how to select and care for chickens. One of our favorites is CITY CHICKS by Patricia Foreman. Another good one is THE CHICKEN WISPERER’S GUIDE TO KEEPING CHICKENS.
Most families who keep a few hens in a backyard coop prefer brown egg laying dual purpose breeds. These tend to be large in body size, calm in temperament, don’t fly well and are fun to be around. Our chickens aren’t pets. We sometimes eat them! But many people enjoy them as pets that lay eggs.
ARE THEY REALLY SMELLY, NOISY, AND DIRTY?
Nope. Like people and other animals, give chickens a clean place to live and plenty of elbow room and they are squeaky clean and don’t smell. Hens cackle a bit, especially when laying an egg, but the noise doesn’t carry far. Roosters can be noisy but few backyard flocks have one and hens will lay plenty of eggs without a rooster around. We put four or five inches of wood shavings, called litter, on the floor of the coop and make sure it stays dry. Wet litter smells. Chicken droppings are dry and become powdery and mix with the litter. Twice a year we scoop it out and add new wood shavings. We work the old litter into our garden and later harvest delicious lettuce, squash, pumpkins, beans and other crops nourished by our chicken compost.
People who claim chickens are filthy and stink often have only encountered them in commercial flocks where they are crammed together and have no access to fresh air, privacy, sunshine or living space.
Treat chickens in a way that you’d like to be treated and they will be clean and content.
Neighbors often have heard the smell myth, and the biggest tip in keeping chickens is to keep the neighbors happy. Our chickens are clean and never smell and we give our neighbors a dozen eggs now and then.
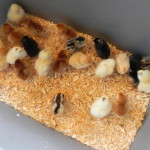
-
-
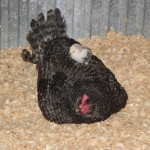
This mama hen with chick on her back fluffs up clean wood chips.
-
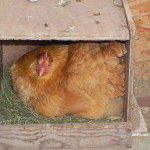
-
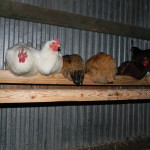
Chickens sheltered from the cold.
-
-
Going on their third lay cycle, the girls are getting old.
WHAT YOU NEED
Fortunately keeping chickens has never cost us much money. Actually, of all the food animals -sheep, cattle, hogs, turkeys, geese and chickens the last is by far the least expensive and the only one well suited to suburban and urban life. Here’s what we have, and if you plan to keep hens what you will need.
COOP: Our coops are not elaborate. Dad and I made a simple one much like the garden sheds sold by big box lumber companies. Actually, one of those sheds could be easily modified to work. When we lived in Kansas we merely designated an 8X8 foot corner of a garage for our birds and made a 2X4 lumber frame with a simple door. We stapled one inch mesh chicken wire to it, and our coop was done. Our current coop is a bigger rectangle of lumber with wire over it in the corner of a small barn. We even salvaged the lumber from a scrap pile. At another home, our coop was made of a small manufactured garden shed. We kept chickens in it for nearly 30 years in the midst of suburbia.
Coops can be made or bought. Dozens are available for sale at some big box stores or through the Internet. These are often attractive but some aren’t very sturdy. You need a sturdy coop to keep out predators. Buying a coop is a great option for someone who isn’t handy with tools. Remember that chickens need at least four square feet of floor space per bird. More room is better.
ROOST: Inside the coop we install a roost. Chickens love to loiter on the roost and sleep there each night. We have woods near the house so we cut a sapling, trimmed it so it would fit in the coop and nailed it to braces on the wall. Works great. We’ve used a 2×4 roost but round off the edges to make it more comfortable to chicken feet.
FEEDER AND WATERER: We made our feeder of scrap wood but they can be purchased inexpensively at feed stores or on line. We use 10 quart buckets for water, but various waterers can also be purchased.
NESTS: We also made our nests of scrap wood and nailed them to the wall. They can be purchased but are so easy to make there’s no need to buy one. A 1”X12” board can be cut and made into a box about 14 inches long with one end open. Plan on one nest per two hens.
LITTER: We buy wood shavings in bales at the feed store and put a four to six inch layer on the floor.
POP HOLE AND RUN: Our chickens have an enormous run of about 2000 square feet. That’s plenty of room for 16 birds, but a smaller run would also work. Ours was a former dog run made of four foot high chain link fencing. That wasn’t high enough to keep the birds in so we bought 4 foot lengths of reinforcing bar at a lumber yard and attached them to the existing fence uprights with car radiator clamps. Then we stretched nylon netting between the rebar posts and attached it with cable ties. Works great. Total height is about six feet, and our heavy breed hens can’t fly over it. If they try, we clip the feathers of a wing. Between the coop and run is a pop hole. It’s just a small door about a foot wide and 18 inches high. We used a drill and Sawzall to cut a hole that size out of the plywood coop wall and used the piece cut out as a door. Two hinges hold one side and a husky raccoon-proof clasp holds it closed.
-
-
Once small chicks are a few weeks old, they are big enough to explore a safe and indoor larger coop.
-
-
-
Our chickens enjoy a spacious outdoor run with shrubs they can lounge and hide under at will.
Once small chicks are a few weeks old, they are big enough to explore a safe and indoor larger coop.
Our chickens enjoy a spacious outdoor run with shrubs they can lounge and hide under at will.
FOOD AND WATER: We enjoy watching our hens forage. They love the insects they catch in their large run and also eat weed seeds, grass and many plants. During the summer our unusually large run produces much of the food needed by our 16 chickens, but we always supplement it with manufactured feed. Baby chicks need feed with high protein, and we feed them CHICK STARTER for about their first four months. Then, about when the first egg appears we switch to LAYER feed. It is lower in protein but high in the calcium hens need to produce eggs and stay healthy. In winter nearly all their nutrition comes from purchased feed. Our first choice is the Nature Wise brand. Their layer mash is super nutritious and even has marigold extract to create bold dark egg yolks. We also feed our hens table scraps. They love most foods we eat. Even the little bits of rice remaining in the sink strainer after we wash dishes goes to the chickens. They love shrimp shells, vegetables, meat scraps, and much more but shun citrus peels. We don’t feed our hens potato peels or egg shells, although some people do. Ours go in the compost bin.
All chickens always need fresh water all the time. We use a commercial fount type waterer for chicks but buckets for mature birds. Many people prefer using large founts for their hens. Our coop is some distance from the house and a water source. It has a metal roof, and a few years ago we installed gutters and rain barrels. Now we merely open the tap of the rain barrel to fill our water buckets. When winter comes we remove the buckets and move a wood frame – again, made from scrap wood – into the coop. It cradles an electrically heated pan made to keep water unfrozen for dogs, but it works great for chickens. Fortunately, we have electric power in our barn/coop. Otherwise we would have to bring fresh water out to the birds a couple of times a day and remove frozen buckets. We did this for thirty-some years at previous homes.
SOME EXTRA TIPS
Hens are programmed by nature to lay the most eggs in spring and summer. We fool them by putting a timer controlled light in the coop. We start using it in October and stop in April. The timer is set to turn one light bulb on at 4 a.m. and off just after dawn. Using a light guarantees plenty of eggs during the winter baking season.
Raccoons, skunks, foxes, coyotes, domestic dogs, hawks and other predators love chicken dinners. Fortunately, most predators are active after dark when chickens are sleeping. Be sure to build a sturdy coop that doesn’t allow them to come in. And, remember to close the pop hole door as soon as the hens go to bed when the sun gets low. If you plan to return after dark, just “shoo” the hens in before you leave and close the pop hole door securely. We improvised some great sticks to use and walk slowly behind the chicken herding them to the door. Move quietly and calmly and after a few times doing this, the hens readily go in before dark.
Mosquitoes and gnats love meals of chicken blood. The windows of our coop have a double layer of wire. One layer is heavy duty with a 1X1 inch mesh that even the strongest raccoon can’t tear. On the inside is mosquito netting. The double wire system keeps out both bugs and larger chicken eaters.
Chickens can ride out cold weather but they don’t like drafts. Make sure the coop is draft free in winter. We close windows when it starts getting cold. The summer equivalent of a draft is a breeze, and chickens love cool breezes on hot day, so make sure the windows are open during warm months.
TO LEARN MORE
You are welcome to contact us at Winding Pathways. We’ll do our best to answer your chicken questions. Here are some final thoughts.
- Many feed and hardware stores as well as nature centers hold basic chicken workshops. Watch for announcements in social and traditional media. A class is a great way to learn chicken husbandry and meet other people with the same hobby.
- Dozens of websites provide information on chickens, chicken coops and where to buy chicks and supplies.
- Many magazines focus articles and ads on backyard chickens. Our favorite is BACKYARD POULTRY.
- A good book for urban and suburban families is CITY CHICKS by Patricia Foreman.
- Hatcheries have become full service. You can call for information or advice, and their paper and on line catalogs are filled with helpful information. You can buy chicks, feed, and supplies from many of them. In recent years we’ve ordered from Hoover’s Hatchery in Rudd, Iowa, and we’ve been pleased with their chicks.
- Premier1 Supplies has a full range of poultry equipment for sale. While they don’t sell chicks, they do sell nearly everything else you would need, including fencing.
- Pet stores, especially in urban areas, sell coops and supplies. Try Petco.
- For coops check Urban Coop Company.
HAVE FUN WITH YOUR CHICKENS!
-
-
Our golden Hen is friendly and quiet.
-
-
We order a mix of compatible breeds.
-
-
An array of jewels. Photo by Lisa Ramlo.
by Winding Pathways | Nov 9, 2015 | Chickens
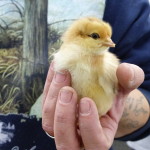
This alert chick will delight a family someday.
There is no better time than The Holiday Season to start thinking about your springtime chicken flock! Yes, now! Make part of your stocking stuffer plans to be a gift certificate for chicks. And, tuck a good chicken book under the tree for winter reading.
Chickens have been part of our lives for over five decades. A daily joy at Winding Pathways is discovering newly laid eggs in out chicken coop. They are as beautiful as jewels and delicious to eat. Our hens recycle kitchen food scraps and garden weeds, snack on insects in their outdoor run, and entertain us with their amazing intelligence, curious antics and colorful feathers. We wouldn’t live without them.
We teach teaching backyard chicken workshops at the Indian Creek Nature Center, and when we ask participants why they are considering keeping a few hens they always seem to say:
*I want my children to learn where food really comes from and to learn responsibility by caring for chickens.
*I want my family to enjoy high quality eggs.
*I want to eat eggs laid by hens that are raised in healthy and humane conditions.
We encourage homeowners to consider keeping a small flock of chickens in the backyard, and there’s good news. The ban against small flocks of chickens is changing fast. Our city, Cedar Rapids, Iowa, for example, changed the ordinance a few years ago to allow chickens. There are but a few restrictions. Only hens are allowed, and people can keep a maximum of six birds. Slaughtering is banned. Other towns across the continent either now allow chickens or are considering changing the ordinance to accommodate citizens who wish to produce food.
Chickens are as at home in suburbia and big cities as they are on farms. Don’t count chickens out if you live in in a metropolis. Many New York City residents, for example, successfully keep chickens, that are often housed in community gardens.
So, in the next couple of months, Winding Pathways encourages readers to do some reading and research to see if chickens are in your future. Look for a detailed blog on the Winding Pathways Website in late December that will have much more detail on chicken husbandry. HERE ARE SOME BASICS:
Where do I get chicks? Local hardware, garden, and farm stores. Find out if they will be selling chicks next spring. Or order on line to arrive in the mail.
What’s the cost? Female chicks, called pullets, cost between $2 and $3 each for most breeds.
When do I order? Tony Halsted, part owner of Hoover’s Hatchery offers this advice: “If you want specific breeds on a specific date place your order in early to mid-January for spring delivery. If you wait we might be sold out”.
When should I have chicks arrive? An ideal time to start baby chicks is three or four weeks before the last killing frost in your area. That’s early to mid-April in northern states and a month earlier in the south.
What will I need? Here are the basics – a coop, nests, feeders, waterers and a place to store feed.
Are they easy to care for? Yes. But remember, they are living creatures that need daily care.
How many eggs will my hens lay? Each bird will lay four to six eggs a week.
Where do I get reliable information? Fortunately, the huge upturn in backyard chicken interest has stimulated the creation of many printed books, blogs and websites crammed with information that helps a novice learn how to care for chickens. Odds are the local library has chicken care books. Also, there are likely people living nearby who have chickens and will share tips. Nature centers and farm and garden stores often sponsor workshops on chicken care, usually in the late winter. And finally, carefully read chicken hatchery websites and catalogs for a host of outstanding information.
Our Favorite Book: CITY CHICKS by Patricia L. Foreman>
Magazine: Backyard Poultry
Website: Scoop From the Coop
Winding Pathways
Hatchery: Hoover’s Hatchery
There are many other excellent books, websites, magazines, and hatcheries.
REMEMBER, WATCH FOR A DETAILED BACKYARD CHICKEN BLOG COMING TO WINDING PATHWAYS LATE WINTER.